The first one displays the login screen or the home screen, based on the condition if you are logged in. The second route validates the login variables on login.
We create the directory /templates/. Create the file /templates/login.html with this code:
{% block body %} {% if session['logged_in'] %}
While functional, the login screen looks like an early 90s User Interface (UI). We picked a random login template from codepen.io. We create the directory /static/ with the file style.css.
As you may have seen, there is no logout button or functionality. Creating that is very easy. The solution proposed below is only one of the many solutions. We create a new route /logout which directs to the function logout(). This function clears the session variable and returns to the login screen.
if __name__ == "__main__": app.secret_key = os.urandom(12) app.run(debug=True,host='0.0.0.0', port=4000)
Connecting a database
If you want a multi-user login system, you should add a database layer to the application. Flask does not have out of the box database support. You have to use a third party library if you want database support. In this tutorial we will use SqlAlchemy. If you do not have that installed type:
$ sudo pip install Flask-SqlAlchemy
SQLAlchemy is an SQL toolkit and object-relational mapper (ORM) for the Python programming language. It has support for MySQL, Microsoft SQL Server and many more relational database management systems. If all of these terms are unfamiliar to you, just keep reading.
Create the file tabledef.py:
from sqlalchemy import * from sqlalchemy import create_engine, ForeignKey from sqlalchemy import Column, Date, Integer, String from sqlalchemy.ext.declarative import declarative_base from sqlalchemy.orm import relationship, backref
engine = create_engine('sqlite:///tutorial.db', echo=True) Base = declarative_base()
This file will create the database structure. Inside the directory you will find a file called tutorial.db. Create a file called dummy.py which will contain this code:
import datetime from sqlalchemy import create_engine from sqlalchemy.orm import sessionmaker from tabledef import *
# create a Session Session = sessionmaker(bind=engine) session = Session()
user = User("admin","password") session.add(user)
user = User("python","python") session.add(user)
user = User("jumpiness","python") session.add(user)
# commit the record the database session.commit()
session.commit()
Execute:
$ python dummy.py
This will put dummy data into your database. Finally we update our app.py
Validating the login credentials with SqlAlchemy The next step is to write the functionality that validates the user and password exist in the database. Using SqlAlchemy we can do this (dummy/pseudo code):
@app.route('/test') deftest():
POST_USERNAME = "python" POST_PASSWORD = "python"
Session = sessionmaker(bind=engine) s = Session() query = s.query(User).filter(User.username.in_([POST_USERNAME]), User.password.in_([POST_PASSWORD]) ) result = query.first() if result: return"Object found" else: return"Object not found " + POST_USERNAME + " " + POST_PASSWORD
We use SqlAlchemys Oject Relational Mapping (ORM). We map the objects to relational database tables and vice versa. The definition (User) is given in tabledef.py. The s.query function is where the query is build. We have two conditions: the username and password must match. The query.first() returns true if the object exists, false if it does not. This gives us this total code:
from flask import Flask from flask import Flask, flash, redirect, render_template, request, session, abort import os from sqlalchemy.orm import sessionmaker from tabledef import * engine = create_engine('sqlite:///tutorial.db', echo=True)
if __name__ == "__main__": app.secret_key = os.urandom(12) app.run(debug=True,host='0.0.0.0', port=4000)
You can now login with any user defined in the database table.
What about security?
We have demonstrated a simple login app above. However, it is your job to properly secure it. There are many guys out there that are going to try to break into your app.
many thanks for this usefull and newby friendly post!
/thorsten
Ghis•Wed, 08 Apr 2015
Nice tutorial. These two variable names could cause confusion / bugs though : session & Session
Catalin Simion•Fri, 12 Feb 2016
Very, very useful, thanks ! :)
James Riley•Sat, 03 Jun 2017
Thanks!
Two questions about your routes/endpoints:
Confused because you are only allowing a POST request to the '/login' endpoint, but your screenshot shows the login screen with the '/login' URL. Shouldn't the user be browsing to the '/' endpoint to get to the login page? How could they browse to the '/login' endpoint if only POST requests are allowed?
Second, with this code, when I successfully issue a POST request to the '/login' endpoint and the home() function is invoked, the content that I returned by home() displays, but my URL bar indicates the '/login' URL. This doesn't really make sense, right? Once we get through the login page, shouldn't we be at the '/' address?
Frank•Sun, 04 Jun 2017
The screenshot is off, it should show the '/' URL endpoint.
Yes, home() should not be called there. Instead to login there we have two options, the first : a reload to the URL '/'. An alternative method, and perhaps better, is to turn it into an API method that you call using an AJAX request. That way there is no hard reload and you save bandwidth when the user base scales.
Ganesh Suresh•Fri, 14 Jul 2017
This is just AWESOME!!! I was able to learn the authentication part from Python so quickly. I Thought it will take few weeks!!.. You made it very easy and simple and we can reuse this for any of our custom applications.
Roman Gagarin•Sun, 16 Jul 2017
Hi, it's not clear where does the chunk of code below go? :| [python] @app.route('/test') def test():
POST_USERNAME = "python" POST_PASSWORD = "python"
Session = sessionmaker(bind=engine) s = Session() query = s.query(User).filter(User.username.in_([POST_USERNAME]), User.password.in_([POST_PASSWORD]) ) result = query.first() if result: return "Object found" else: return "Object not found " + POST_USERNAME + " " + POST_PASSWORD [/python] Thanks, Roman
Frank•Sun, 16 Jul 2017
Hi Roman,
This is a new route, just a pseudo code for login demonstrating session creation. In the code snippet below there are a few routes:

 Pythonspot.com Login Screen Python
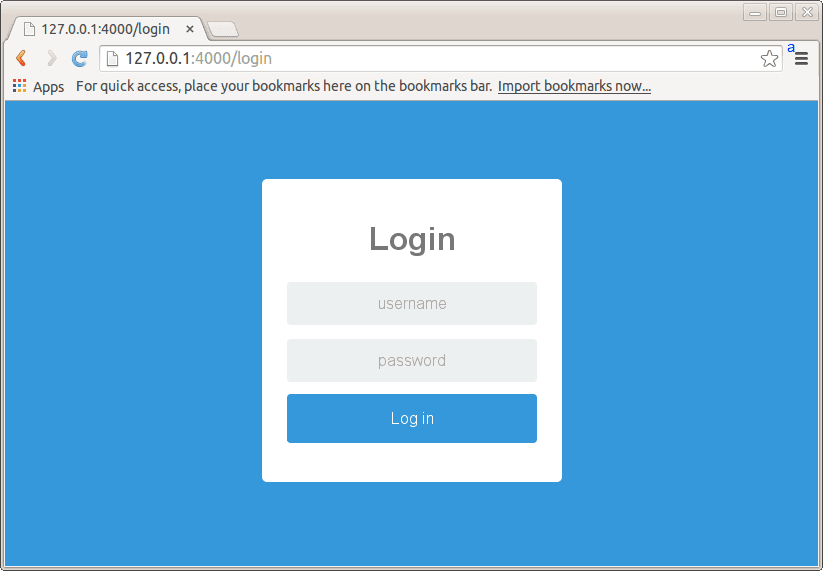 Python login screen Flask
Leave a Reply:
Nice tutorial.
many thanks for this usefull and newby friendly post!
/thorsten
Nice tutorial. These two variable names could cause confusion / bugs though : session & Session
Very, very useful, thanks ! :)
Thanks!
Two questions about your routes/endpoints:
Confused because you are only allowing a POST request to the '/login' endpoint, but your screenshot shows the login screen with the '/login' URL. Shouldn't the user be browsing to the '/' endpoint to get to the login page? How could they browse to the '/login' endpoint if only POST requests are allowed?
Second, with this code, when I successfully issue a POST request to the '/login' endpoint and the home() function is invoked, the content that I returned by home() displays, but my URL bar indicates the '/login' URL. This doesn't really make sense, right? Once we get through the login page, shouldn't we be at the '/' address?
The screenshot is off, it should show the '/' URL endpoint.
Yes, home() should not be called there. Instead to login there we have two options, the first : a reload to the URL '/'. An alternative method, and perhaps better, is to turn it into an API method that you call using an AJAX request. That way there is no hard reload and you save bandwidth when the user base scales.
This is just AWESOME!!! I was able to learn the authentication part from Python so quickly. I Thought it will take few weeks!!.. You made it very easy and simple and we can reuse this for any of our custom applications.
Hi, it's not clear where does the chunk of code below go? :|
[python]
@app.route('/test')
def test():
POST_USERNAME = "python"
POST_PASSWORD = "python"
Session = sessionmaker(bind=engine)
s = Session()
query = s.query(User).filter(User.username.in_([POST_USERNAME]), User.password.in_([POST_PASSWORD]) )
result = query.first()
if result:
return "Object found"
else:
return "Object not found " + POST_USERNAME + " " + POST_PASSWORD
[/python]
Thanks,
Roman
Hi Roman,
This is a new route, just a pseudo code for login demonstrating session creation.
In the code snippet below there are a few routes:
[python]
@app.route('/')
@app.route('/login', methods=['POST'])
@app.route("/logout")
[/python]
You'll see the route to login is identitical, it will create a new session.
[python]
app.route('/login', methods=['POST'])
[/python]
Run the code in the last snippet, ignore the pseudocode block :)