Python hosting : Host, run, and code Python in the cloud!
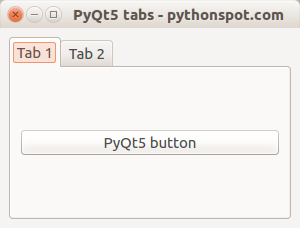
In this tutorial, you’ll dive deep into using tabs in PyQt5 QTabWidget works in PyQt5. This widget allows for the inclusion of tabs (QWidgets) that can feature various widgets like labels, buttons, images, and more.
Related course:
PyQt5 Tabs Demonstration: PyQt5
1
2
3
4
5
6
7
8
9
10
11
12
13
14
15
16
17
18
19
20
21
22
23
24
25
26
27
28
29
30
31
32
33
34
35
36
37
38
39
40
41
42
43
44
45
46
47
48
49
50
51
52
53
54
55
56
57
58
import sysfrom PyQt5.QtWidgets import QMainWindow, QApplication, QPushButton, QWidget, QAction, QTabWidget,QVBoxLayoutfrom PyQt5.QtGui import QIconfrom PyQt5.QtCore import pyqtSlotclass App (QMainWindow ): def __init__ (self ): super ().__init__() self.title = 'PyQt5 tabs - pythonspot.com' self.left = 0 self.top = 0 self.width = 300 self.height = 200 self.setWindowTitle(self.title) self.setGeometry(self.left, self.top, self.width, self.height) self.table_widget = MyTableWidget(self) self.setCentralWidget(self.table_widget) self.show() class MyTableWidget (QWidget ): def __init__ (self, parent ): super (QWidget, self).__init__(parent) self.layout = QVBoxLayout(self) self.tabs = QTabWidget() self.tab1 = QWidget() self.tab2 = QWidget() self.tabs.resize(300 ,200 ) self.tabs.addTab(self.tab1,"Tab 1" ) self.tabs.addTab(self.tab2,"Tab 2" ) self.tab1.layout = QVBoxLayout(self) self.pushButton1 = QPushButton("PyQt5 button" ) self.tab1.layout.addWidget(self.pushButton1) self.tab1.setLayout(self.tab1.layout) self.layout.addWidget(self.tabs) self.setLayout(self.layout) @pyqtSlot() def on_click (self ): print ("\n" ) for currentQTableWidgetItem in self.tableWidget.selectedItems(): print (currentQTableWidgetItem.row(), currentQTableWidgetItem.column(), currentQTableWidgetItem.text()) if __name__ == '__main__' : app = QApplication(sys.argv) ex = App() sys.exit(app.exec_())
Deep Dive Explanation:
If you’re looking to integrate a table into a window, start by creating a new class, which is done as follows:
1 class MyTableWidget (QWidget )
The tab screen initialization is achieved by creating a QTabWidget and designating two QWidgets for the tabs:
1
2
3
4
self.tabs = QTabWidget() self.tab1 = QWidget() self.tab2 = QWidget() self.tabs.resize(300 ,200 )
These tabs can then be added to the tab widget:
1 2 self.tabs.addTab(self.tab1,"Tab 1" ) self.tabs.addTab(self.tab2,"Tab 2" )
Content for a specific tab is created as follows:
1
2
3
4
self.tab1.layout = QVBoxLayout(self) self.pushButton1 = QPushButton("PyQt5 button" ) self.tab1.layout.addWidget(self.pushButton1) self.tab1.setLayout(self.tab1.layout)
To conclude, integrate the tabs into the widget:
1
2
self.layout.addWidget(self.tabs) self.setLayout(self.layout)
And, don’t overlook integrating your custom tab widget into the main window:
1
2
self.table_widget = MyTableWidget(self) self.setCentralWidget(self.table_widget)
Download PyQT5 Examples
Navigate through the PyQt5 guide: Previous Next

Leave a Reply: