
Tag: wxpython
wxpython button
To create a button simply call wx.Button(). When creating a button with wx.Button() it is important to parse the panel as first argument. We attach it to a panel because attaching to the frame would make it full screen.
A panel gives you to option to position widgets anywhere in the window. The parameter (10,10) is the position on the panel. The id argument is necessary, but it is equal to -1 (wx.ID_ANY == -1). The 3rd parameter is the text on the button.
Related course:
Creating GUI Applications with wxPython
You can use the code below to create a button in wxPython:
#!/usr/bin/python |
The function onButton() is called if the button is pressed. We bind (connect) it with button.Bind(wx.EVT_BUTTON, onButton).
Output:
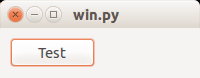
Image on button
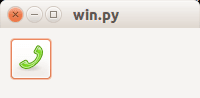
wxPython supports having images on buttons. Only a minor change is needed to display an image on a button. While the function is called wx.BitmapButton, it supports other image formats.
bmp = wx.Bitmap("call-start.png", wx.BITMAP_TYPE_ANY) |
The first line loads the image, the second line creates the button.
Full code:
#!/usr/bin/python |
Output:
Related course:
Creating GUI Applications with wxPython
wxpython dialog
To display a dialog with wxPython requires only a few lines of code. We will demonstrate that below. We’ll discuss information dialog, simple dialog, error dialog, warning dialog and others.
Related course: Creating GUI Applications with wxPython
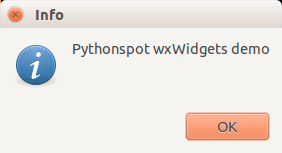
Information dialog
An information dialog can be shown with one line of code:
import wx |
The first parameter is the actual text to display. The second is the title and final parameter tells wx to show the information icon and button.
Output:
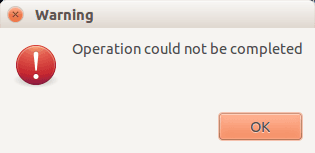
More dialogs: Warning dialog, Error dialog and default dialog
By modifying the parameters you can easily create other types of dailogs. An example below:
import wx |
Output (only one of the dialogs):
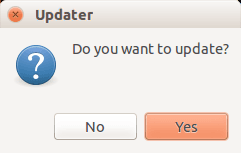
Question dialog
Wx can be used to create a question dialog (yes/no). Example code:
import wx |
Output:
Related course: Creating GUI Applications with wxPython
wxPython window
wxPython is a GUI toolkit for the Python programming language. wxPython can be used to create graphical user interfaces (GUI).
Applications made with wxPython have a native appearance on all platforms. The application will appear as native application unlike QT or Tk which have a custom QT or Tk look. It runs on all major desktop platforms.
Currently supported operating systems are Microsoft Windows (32-bit), most Unix or unix-like systems, and Macintosh OS X.
Related course: Creating GUI Applications with wxPython
The wxPython module is based on the C++ GUI library wxWidgets.
wxPython window
To open a window with wxPython, run the code below:
#!/usr/bin/python |
The line wx.App() creates an application object. Each wx program needs to have one .App() object.
The method wx.Frame() returns a new window which can contain widgets.
app.Mainloop() puts the application in the main loop and listens for events.
Window size and position
You can set the position and size with the SetDimensions() function:
#!/usr/bin/python |
The parameters of the function are: x (left), y (top), width and height. The function not only sets the screen resolution but also the position on the screen.
Center a window
To put the window in the center of the screen call:
frame.Centre() |
Related course: Creating GUI Applications with wxPython
wx python
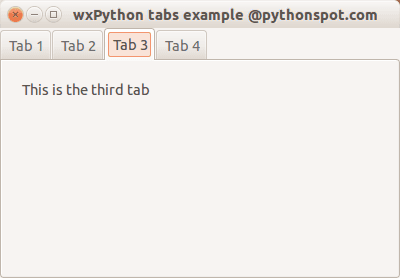
While we did not heavily use object orientation for the wxPython series yet for simplicity reasons, we cannot go around it. In this tutorial you will learn how to create a tab interface with wxPython.
Related course: Creating GUI Applications with wxPython
The class Mainframe creates the frame as we did in the previous examples. The other classes are the contents of the tabs. We create a panel and notebook (tab holder) in the main frame. Then we create tab objects :
tab1 = TabOne(nb) |
which we attach to the tab holder using:
nb.AddPage(tab1, "Tab 1") |
Full code:
import wx |
Output:
Related course: Creating GUI Applications with wxPython