
Category: pyqt5
Python hosting: Host, run, and code Python in the cloud!
PyQt5 window
If you do not have PyQT5 installed, you should install it first.
In a terminal you can type:
sudo apt-get install python3-pyqt5 |
If you are on a Windows or Mac computer, you can download PyQT5 from: https://www.riverbankcomputing.com/software/pyqt/download5
Related courses:
PyQt5 window
You can create a PyQT5 window using the code below:
import sys from PyQt5.QtWidgets import QApplication, QWidget from PyQt5.QtGui import QIcon class App(QWidget): def __init__(self): super().__init__() self.title = 'PyQt5 simple window - pythonspot.com' self.left = 10 self.top = 10 self.width = 640 self.height = 480 self.initUI() def initUI(self): self.setWindowTitle(self.title) self.setGeometry(self.left, self.top, self.width, self.height) self.show() if __name__ == '__main__': app = QApplication(sys.argv) ex = App() sys.exit(app.exec_()) |
We set the window size using the setGeometry(left,top,width,height) method. The window title is set using setWindowTitle(title). Finally show() is called to display the window.
Run with:
python3 window.py |
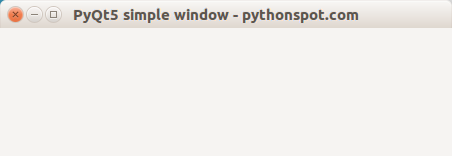
The output should look similar to the screenshot above (depending on your operating system).
PyQt5 statusbar
PyQt5 supports a window status bar. To add a status bar add the line:
self.statusBar().showMessage('Message in statusbar.') |
A statusbar can be added to the main window (QMainWindow). It is one of the methods the class itself contains;
Related course:
PyQt5 statusbar example:
The program below adds a statusbar to a PyQt5 window:
import sys from PyQt5.QtWidgets import QApplication, QWidget, QMainWindow from PyQt5.QtGui import QIcon class App(QMainWindow): def __init__(self): super().__init__() self.title = 'PyQt5 status bar example - pythonspot.com' self.left = 10 self.top = 10 self.width = 640 self.height = 480 self.initUI() def initUI(self): self.setWindowTitle(self.title) self.setGeometry(self.left, self.top, self.width, self.height) self.statusBar().showMessage('Message in statusbar.') self.show() if __name__ == '__main__': app = QApplication(sys.argv) ex = App() sys.exit(app.exec_()) |
The example creates a window (QMainWindow). We set the screen parameters using:
self.left = 10 self.top = 10 self.width = 640 self.height = 480 |
Window properties are set in the initUI() method which is called in the constructor. The method:
statusBar().showMessage() |
sets the text on the statusbar.
PyQt5 buttons
PyQt5 supports buttons using the QPushButton class. This class is inside the PyQt5.QtWidgets group. The button can be created by calling the constructor QPushButton with the text to display as parameter.
Related course:
Introduction
To use buttons with a PyQt5 application, we need to update our import line:
from PyQt5.QtWidgets import QApplication, QWidget, QPushButton from PyQt5.QtCore import pyqtSlot |
In the initUI() method, add these lines of code:
button = QPushButton('PyQt5 button', self) button.setToolTip('This is an example button') button.move(100,70) |
QPushButton creates the widget, the first argument is text on the button.
The method setToolTip shows the message when the user points the mouse on the button.
Finally the button is moved to the coordinates x=100,y=70.
We need to create a method for a button click:
@pyqtSlot() def on_click(self): print('PyQt5 button click') |
Add connect the method to the click with:
button.clicked.connect(self.on_click) |
Final PyQt5 button code:
import sys from PyQt5.QtWidgets import QApplication, QWidget, QPushButton from PyQt5.QtGui import QIcon from PyQt5.QtCore import pyqtSlot class App(QWidget): def __init__(self): super().__init__() self.title = 'PyQt5 button - pythonspot.com' self.left = 10 self.top = 10 self.width = 320 self.height = 200 self.initUI() def initUI(self): self.setWindowTitle(self.title) self.setGeometry(self.left, self.top, self.width, self.height) button = QPushButton('PyQt5 button', self) button.setToolTip('This is an example button') button.move(100,70) button.clicked.connect(self.on_click) self.show() @pyqtSlot() def on_click(self): print('PyQt5 button click') if __name__ == '__main__': app = QApplication(sys.argv) ex = App() sys.exit(app.exec_()) |
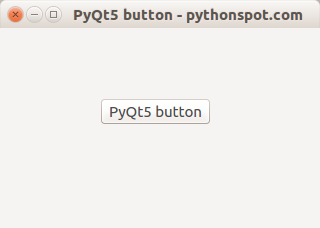
Screenshot of PyQt5 button example above.
PyQt5 signals and slots
Graphical applications (GUI) are event-driven, unlike console or terminal applications. A users action like clicks a button or selecting an item in a list is called an event.
If an event takes place, each PyQt5 widget can emit a signal. A signal does not execute any action, that is done by a slot.
Related course:
Signals and slot introduction
Consider this example:
button.clicked.connect(self.slot_method) |
The button click (signal) is connected to the action (slot). In this example, the method slot_method will be called if the signal emits.
This principle of connecting slots methods or function to a widget, applies to all widgets,
widget.signal.connect(slot_method) |
or we can explicitly define the signal:
QtCore.QObject.connect(widget, QtCore.SIGNAL(‘signalname’), slot_function) |
PyQt supports many type of signals, not just clicks.
Example
We can create a method (slot) that is connected to a widget. A slot is any callable function or method.
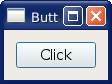
On running the application, we can click the button to execute the action (slot).
from PyQt5.QtWidgets import (QApplication, QComboBox, QDialog, QDialogButtonBox, QFormLayout, QGridLayout, QGroupBox, QHBoxLayout, QLabel, QLineEdit, QMenu, QMenuBar, QPushButton, QSpinBox, QTextEdit, QVBoxLayout) import sys class Dialog(QDialog): def slot_method(self): print('slot method called.') def __init__(self): super(Dialog, self).__init__() button=QPushButton("Click") button.clicked.connect(self.slot_method) mainLayout = QVBoxLayout() mainLayout.addWidget(button) self.setLayout(mainLayout) self.setWindowTitle("Button Example - pythonspot.com") if __name__ == '__main__': app = QApplication(sys.argv) dialog = Dialog() sys.exit(dialog.exec_()) |
PyQt5 messagebox
In this article you will learn how to create a PyQt5 messagebox:
To show a messagebox we need to import QMessageBox.
from PyQt5.QtWidgets import QApplication, QWidget, QPushButton, QMessageBox |
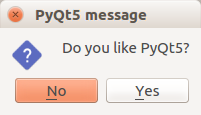
We use the method QMessageBox.question() to display the messagebox.
PyQt5 messagebox code
Copy the code below to display a messagebox.
import sys from PyQt5.QtWidgets import QApplication, QWidget, QPushButton, QMessageBox from PyQt5.QtGui import QIcon from PyQt5.QtCore import pyqtSlot class App(QWidget): def __init__(self): super().__init__() self.title = 'PyQt5 messagebox - pythonspot.com' self.left = 10 self.top = 10 self.width = 320 self.height = 200 self.initUI() def initUI(self): self.setWindowTitle(self.title) self.setGeometry(self.left, self.top, self.width, self.height) buttonReply = QMessageBox.question(self, 'PyQt5 message', "Do you like PyQt5?", QMessageBox.Yes | QMessageBox.No, QMessageBox.No) if buttonReply == QMessageBox.Yes: print('Yes clicked.') else: print('No clicked.') self.show() if __name__ == '__main__': app = QApplication(sys.argv) ex = App() sys.exit(app.exec_()) |
More buttons for a messagebox
Take into account we use QMessageBox.Yes and QMessageBox.No. We can easily add other options:
buttonReply = QMessageBox.question(self, 'PyQt5 message', "Do you want to save?", QMessageBox.Yes | QMessageBox.No | QMessageBox.Cancel, QMessageBox.Cancel) print(int(buttonReply)) if buttonReply == QMessageBox.Yes: print('Yes clicked.') if buttonReply == QMessageBox.No: print('No clicked.') if buttonReply == QMessageBox.Cancel: print('Cancel') |
The available buttons are:
| Overview | ||
| QMessageBox.Cancel | QMessageBox.Ok | QMessageBox.Help |
| QMessageBox.Open | QMessageBox.Save | QMessageBox.SaveAll |
| QMessageBox.Discard | QMessageBox.Close | QMessageBox.Apply | QMessageBox.Reset | QMessageBox.Yes | QMessageBox.YesToAll |
| QMessageBox.No | QMessageBox.NoToAll | QMessageBox.NoButton |
| QMessageBox.RestoreDefaults | QMessageBox.Abort | QMessageBox.Retry |
| QMessageBox.Ignore |
PyQt5 textbox example
In this article you will learn how to use a textbox in PyQt5. The widget is called QLineEdit and has the methods setText() to set the textbox value and text() to get the value.
We can set the size of the textbox using the resize(width,height) method. The position can be set using the move(x,y) method or using a grid layout.
Related course:
PyQt5 textbox
Creation of the textbox is fairly straightforward:
self.textbox = QLineEdit(self) self.textbox.move(20, 20) self.textbox.resize(280,40) |
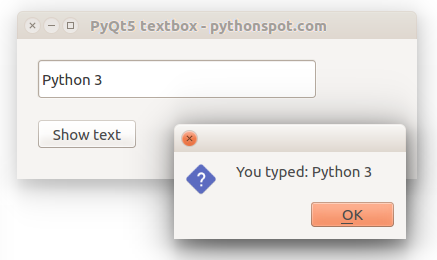
PyQt5 textbox example
The example below creates a window with a textbox.
import sys from PyQt5.QtWidgets import QMainWindow, QApplication, QWidget, QPushButton, QAction, QLineEdit, QMessageBox from PyQt5.QtGui import QIcon from PyQt5.QtCore import pyqtSlot class App(QMainWindow): def __init__(self): super().__init__() self.title = 'PyQt5 textbox - pythonspot.com' self.left = 10 self.top = 10 self.width = 400 self.height = 140 self.initUI() def initUI(self): self.setWindowTitle(self.title) self.setGeometry(self.left, self.top, self.width, self.height) # Create textbox self.textbox = QLineEdit(self) self.textbox.move(20, 20) self.textbox.resize(280,40) # Create a button in the window self.button = QPushButton('Show text', self) self.button.move(20,80) # connect button to function on_click self.button.clicked.connect(self.on_click) self.show() @pyqtSlot() def on_click(self): textboxValue = self.textbox.text() QMessageBox.question(self, 'Message - pythonspot.com', "You typed: " + textboxValue, QMessageBox.Ok, QMessageBox.Ok) self.textbox.setText("") if __name__ == '__main__': app = QApplication(sys.argv) ex = App() sys.exit(app.exec_()) |