
Category: pro
Python hosting: Host, run, and code Python in the cloud!
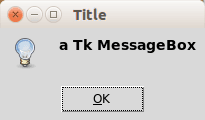
tkinter askquestion dialog
Tkinter supports showing a message box. The implementation you need depends on your Python version. To test your version:
python -- version |
Tkinter question dialog
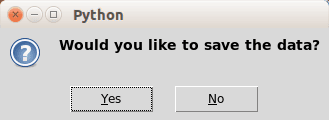
Tkinter can be used to ask the users questions.
Python 2.x
The Python 2.x version:
import Tkinter import tkMessageBox result = tkMessageBox.askyesno("Python","Would you like to save the data?") print result |
Python 3
The Python 3.x version:
import tkinter from tkinter import messagebox messagebox.askokcancel("Python","Would you like to save the data?") |
Result:
Tkinter message boxes
This code will open some Tkinter question boxes:
Python 2.7
The Python 2.x version:
import Tkinter import tkMessageBox # Confirmation messagebox tkMessageBox.askokcancel("Title","The application will be closed") # Option messagebox tkMessageBox.askyesno("Title","Do you want to save?") # Try again messagebox tkMessageBox.askretrycancel("Title","Installation failed, try again?") |
Python 3
The Python 3.x version:
import tkinter from tkinter import messagebox messagebox.askokcancel("Title","The application will be closed") messagebox.askyesno("Title","Do you want to save?") messagebox.askretrycancel("Title","Installation failed, try again?") |
Result:

Tk window and button
Tk button with onClick event
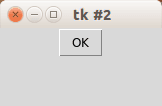
To create a Tkinter window with a button use the example below. The program enters mainloop() which wait for events (user actions). We define the button which has a callback to the function callback(). master is the root window, the window where your button will appear in.
from Tkinter import * master = Tk() def callback(): print "click!" b = Button(master, text="OK", command=callback) b.pack() mainloop() |
Related course
Tk image button
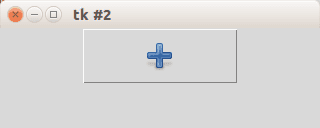
If you want an image button, use the PhotoImage class. We set the size of the window and the miminum size with the functions minsize() and geometry(). Example:
from Tkinter import * master = Tk() master.minsize(300,100) master.geometry("320x100") def callback(): print "click!" photo=PhotoImage(file="add.png") b = Button(master,image=photo, command=callback, height=50, width=150) b.pack() mainloop() |
Result:
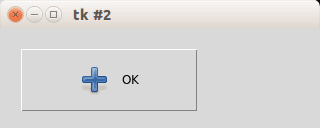
Tk Image button with text label
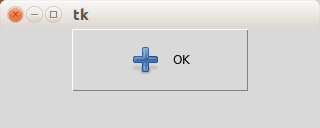
If you want both an image and text, simply add the parameter compound=LEFT.
from Tkinter import * master = Tk() master.minsize(300,100) master.geometry("320x100") def callback(): print "click!" photo=PhotoImage(file="add.png") b = Button(master,image=photo, text="OK", command=callback, height=50, width=150, compound=LEFT) b.pack() mainloop() |
Result:
Button location
If you want to place the button on your coordinates do not use the pack() function but instead use the function place(x,y), as shown in the example below:
from Tkinter import * master = Tk() master.minsize(300,100) master.geometry("320x100") def callback(): print "click!" photo=PhotoImage(file="add.png") b = Button(master,image=photo, text="OK", command=callback, height=50, width=150, compound=LEFT) b.place(x = 20, y = 20) mainloop() |
Result:
Tk menubar
The Tkinter toolkit comes with all the basic widgets to create graphical applications. Almost every app has a main menu. As expected, Tkinter supports adding a main menu to your application window.
The screenshot below demonstrates a Tkinter based menu:

Related course
Tkinter menubar
You can create a simle menu with Tkinter using the code below. Every option (new, open, save.. ) should have its own callback.
from Tkinter import * def donothing(): x = 0 root = Tk() menubar = Menu(root) filemenu = Menu(menubar, tearoff=0) filemenu.add_command(label="New", command=donothing) filemenu.add_command(label="Open", command=donothing) filemenu.add_command(label="Save", command=donothing) filemenu.add_separator() filemenu.add_command(label="Exit", command=root.quit) menubar.add_cascade(label="File", menu=filemenu) helpmenu = Menu(menubar, tearoff=0) helpmenu.add_command(label="Help Index", command=donothing) helpmenu.add_command(label="About...", command=donothing) menubar.add_cascade(label="Help", menu=helpmenu) root.config(menu=menubar) root.mainloop() |
We create the menubar with the call:
menubar = Menu(root) |
where root is a Tk() object.
A menubar may contain zero or more submenus such as the file menu, edit menu, view menu, tools menu etcetera.
A submenu can be created using the same Menu() call, where the first argument is the menubar to attach to.
filemenu = Menu(menubar, tearoff=0) menu = Menu(menubar, tearoff=0) |
Individual options can be added to these submenus using the add_command() method:
filemenu.add_command(label="New", command=donothing) filemenu.add_command(label="Open", command=donothing) filemenu.add_command(label="Save", command=donothing) |
In the example we created the callback function donothing() and linked every command to it for simplicity. An option is added using the add_comment() function. We call add_cascade() to add this menu list to the specific list.
Tk widgets
Tkinter has several widgets including:
- Label
- EditText
- Images
- Buttons (Discussed before)
In this article we will show how to use some of these Tkinter widgets. Keep in mind there’s a slight difference between Tkinter for Python 2.x and 3.x
Related course
Label
To create a label we simply call the Label() class and pack it. The numbers padx and pady are the horizontal and vertical padding.
from Tkinter import * root = Tk() root.title('Python Tk Examples @ pythonspot.com') Label(root, text='Python').pack(pady=20,padx=50) root.mainloop() |
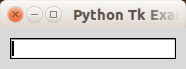
EditText (Entry widget)
To get user input you can use an Entry widget.
from Tkinter import * root = Tk() root.title('Python Tk Examples @ pythonspot.com') var = StringVar() textbox = Entry(root, textvariable=var) textbox.focus_set() textbox.pack(pady=10, padx=10) root.mainloop() |
Result:
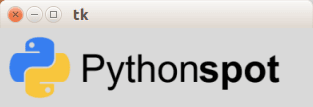
Images
Tk has a widget to display an image, the PhotoImage. It is quite easy to load an image:
from Tkinter import * import os root = Tk() img = PhotoImage(file="logo2.png") panel = Label(root, image = img) panel.pack(side = "bottom", fill = "both", expand = "yes") root.mainloop() |
Result:
GUI editor
An overview of Tkinter GUI editors can be found here: http://wiki.tcl.tk/4056
Tkinter tkFileDialog module
tkFileDialog is a module with open and save dialog functions.
Instead of implementing those in Tkinter GUI on your own.
Related courses
Overview
An overview of file dialogs:
| Function | Parameters | Purpose |
|---|---|---|
| .askopenfilename | Directory, Title, Extension | To open file: Dialog that requests selection of an existing file. |
| .asksaveasfilename | Directory, Title, Extension) | To save file: Dialog that requests creation or replacement of a file. |
| .askdirectory | None | To open directory |
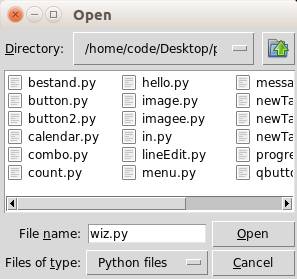
Tkinter Open File
The askopenfilename function to creates an file dialog object. The extensions are shown in the bottom of the form (Files of type). The code below will simply show the dialog and return the filename. If a user presses cancel the filename is empty. On a Windows machine change the initialdir to “C:\”.
Python 2.7 version:
from Tkinter import *from Tkinter import * import Tkinter, Tkconstants, tkFileDialog root = Tk() root.filename = tkFileDialog.askopenfilename(initialdir = "/",title = "Select file",filetypes = (("jpeg files","*.jpg"),("all files","*.*"))) print (root.filename) |
Python 3 version:
from tkinter import filedialog from tkinter import * root = Tk() root.filename = filedialog.askopenfilename(initialdir = "/",title = "Select file",filetypes = (("jpeg files","*.jpg"),("all files","*.*"))) print (root.filename) |
Here is an example (on Linux):
Tkinter Save File
The asksaveasfilename function prompts the user with a save file dialog.
Python 2.7 version
from Tkinter import * import Tkinter, Tkconstants, tkFileDialog root = Tk() root.filename = tkFileDialog.asksaveasfilename(initialdir = "/",title = "Select file",filetypes = (("jpeg files","*.jpg"),("all files","*.*"))) print (root.filename) |
Python 3 version
from tkinter import filedialog from tkinter import * root = Tk() root.filename = filedialog.asksaveasfilename(initialdir = "/",title = "Select file",filetypes = (("jpeg files","*.jpg"),("all files","*.*"))) print (root.filename) |
Tkinter Open Directory
The askdirectory presents the user with a popup for directory selection.
Python 2.7 version
from Tkinter import * import Tkinter, Tkconstants, tkFileDialog root = Tk() root.directory = tkFileDialog.askdirectory() print (root.directory) |
