
Tag: GUI - Page 3
Python hosting: Host, run, and code Python in the cloud!
Tag: GUI
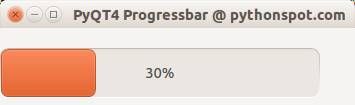
QT4 Progressbar
In this article we will demonstrate how to use the progressbar widget. The progressbar is different from the other widgets in that it updates in time.
Related course:
QT4 Progressbar Example
Let’s start with the code:
#! /usr/bin/env python # -*- coding: utf-8 -*- # import sys from PyQt4.QtGui import * from PyQt4.QtCore import * from PyQt4.QtCore import pyqtSlot,SIGNAL,SLOT class QProgBar(QProgressBar): value = 0 @pyqtSlot() def increaseValue(progressBar): progressBar.setValue(progressBar.value) progressBar.value = progressBar.value+1 # Create an PyQT4 application object. a = QApplication(sys.argv) # The QWidget widget is the base class of all user interface objects in PyQt4. w = QWidget() # Set window size. w.resize(320, 240) # Set window title w.setWindowTitle("PyQT4 Progressbar @ pythonspot.com ") # Create progressBar. bar = QProgBar(w) bar.resize(320,50) bar.setValue(0) bar.move(0,20) # create timer for progressBar timer = QTimer() bar.connect(timer,SIGNAL("timeout()"),bar,SLOT("increaseValue()")) timer.start(400) # Show window w.show() sys.exit(a.exec_()) |
The instance bar (of class QProgBar) is used to hold the value of the progressbar. We call the function setValue() to update its value. The parameter w is given to attach it to the main window. We then move it to position (0,20) on the screen and give it a width and height.
To update the progressbar in time we need a QTimer(). We connect the widget with the timer, which calls the function increaseValue(). We set the timer to repeat the function call every 400 milliseconds. You also see the words SLOT and SIGNAL. If a user does an action such as clicking on a button, typing text in a box – the widget sends out a signal. This signal does nothing, but it can be used to connect with a slot, that acts as a receiver and acts on it.
Result:
QML and PyQT: Creating a GUI (tutorial)
If you have not done our first PyQT tutorial yet, you should do it, it’s fun! In this tutorial we will use PyQT4 and a user interface markup language, a language that describes the graphical user interfaces and controls .
Related course:
QML and PyQT
An excerpt of user interface markup graphical user interfaces and language code could look like:
Rectangle { id: simplebutton color: "grey" width: 150; height: 75 |
Essentially the language tells what the interface should look like. The language we will be using is called QML.
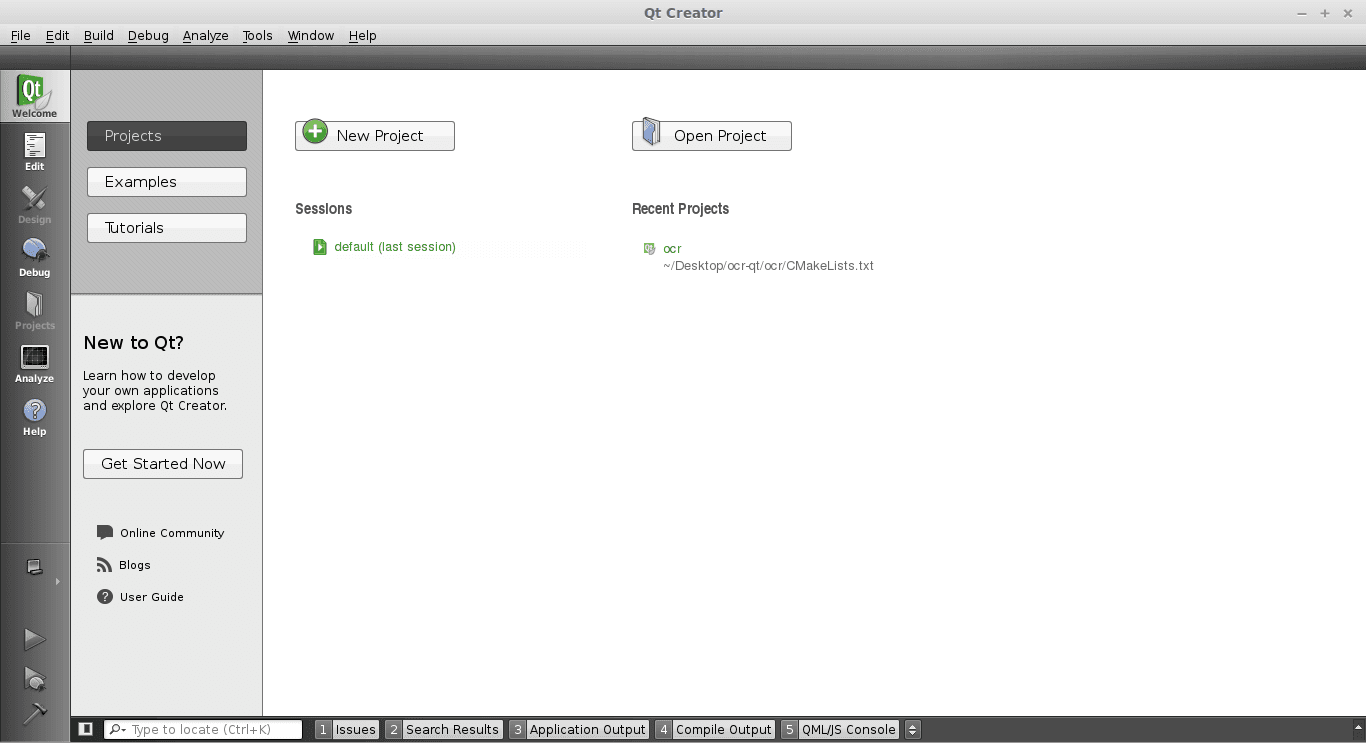
QTCreator
Start a programmed called QTCreator. The tutorial will be quite graphical to help you through the whole process. Simply type qtcreator in the terminal or start it from the menu list. This screen should pop up:
Creating a GUI
Press the big New Project button. Select QT Quick Application from the menu below. Finally press Choose on the bottom right.
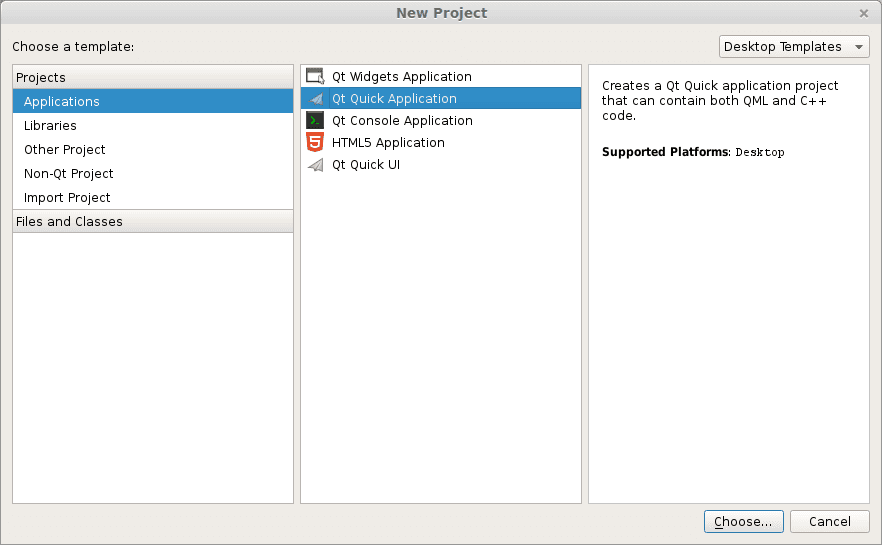
A new popup will appear:
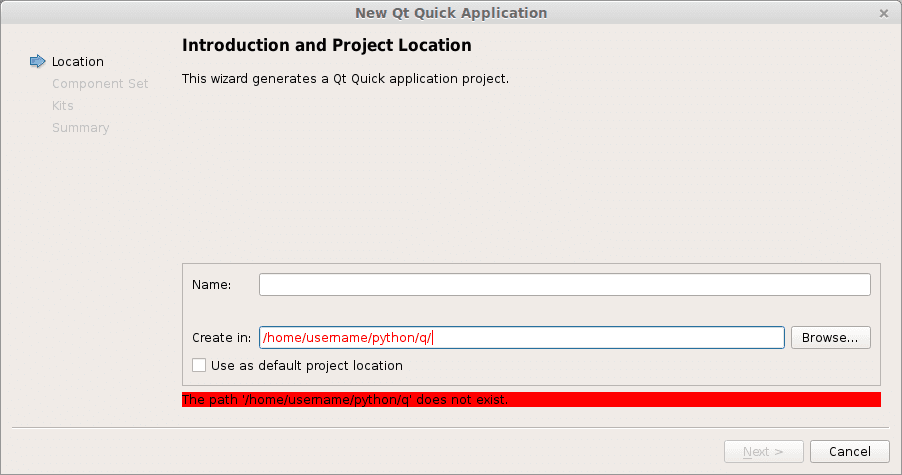
Type a name and a valid path to save your project. Then press Next. Select QT Quick 2.0 from the menu list. Press Next. Press Finish. Immediately a user interface defined in the QML language will appear.
Like all great programmers we are going to solve things the most lazy way possible. Instead of typing all the QML code by hand we are going to press the Design button that is on the left of the screen. A drag and drop screen should appear now.
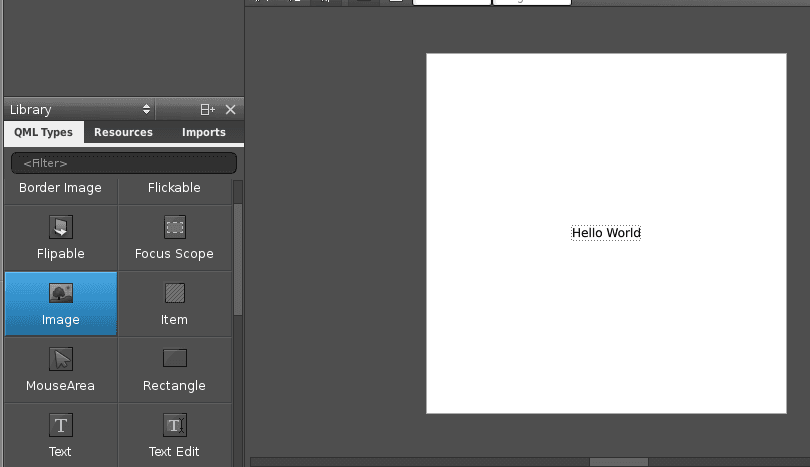
We drag an image onto the area and select the source on the right. Save the project. Open a terminal and locate the qml file you just created. Alternatively you could simply copy the code in the edit box and save it to a .qml file. Enter the command:
qmlviewer main.qml |
This will display the windows as defined in the qml file without any functionality. It is simply a viewer for the interface. We then create some code to load this QML definition:
import sys from PyQt4.QtCore import QDateTime, QObject, QUrl, pyqtSignal from PyQt4.QtGui import QApplication from PyQt4.QtDeclarative import QDeclarativeView app = QApplication(sys.argv) # Create the QML user interface. view = QDeclarativeView() view.setSource(QUrl('main.qml')) view.setResizeMode(QDeclarativeView.SizeRootObjectToView) view.setGeometry(100, 100, 400, 240) view.show() app.exec_() |
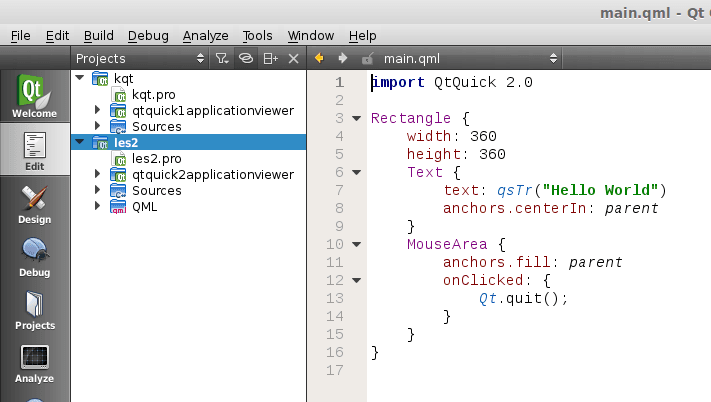
Finally we modify the first line main.qml to:
import Qt 4.7 |
Simply because our QtQuick was missing. Running
python run.py |
Will now display our user interface as defined by QML:
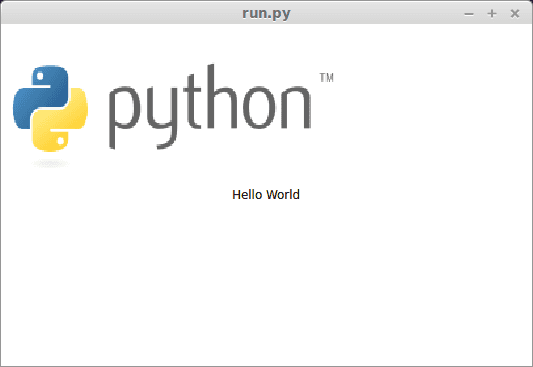
All of the code is simply PyQT, so you could add code like in the previous tutorial. These are the two methods to create a graphical interface with PyQT. This method may be more loosely coupled to the code compared to the method of creating a GUI with QT in the previous tutorial. Despite that both are valid methods.
Download PyQT4 Examples (Bulk Collection)
You may like: Application GUI with PyQT4 or the PyQt4 Tutorials
wxPython GUI tutorial
The official wxPython site has several screenshots and downloads for these platforms. wxPython is based on wxWidgets.
Install wxPython
First download and install WxPython, the Python bindings for wxWidgets.
sudo apt-get install python-wxgtk2.8 python-wxtools wx2.8-doc wx2.8-examples wx2.8-headers wx2.8-i18n |
Then install a GUI creator called wxglade:
sudo apt-get install wxglade |
Using a GUI builder such as wxGlade will save you a lot of time, regardless of the GUI library you use. You can easily make complex graphical interfaces because you can simply drag and drop.
Creating our first GUI with Python and wxWidgets:
Start wxglade. You will see its user interface:
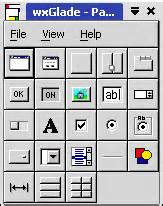
Press on tiny window on the top left, below the file icon.

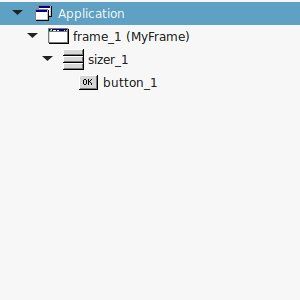
Press OK. An empty window will now appear. Press on the tiny [OK] button in the wxGlade panel and press on the frame. The button will now appear. Press on Application in the tree window.
Set the output file in the wxproperties window.
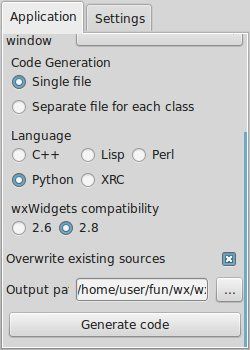
If you look at the window note you can select multiple programming languages and two versions of wxWidgets. Select Python and wxWidgets 2.8. Finally press Generate code. (Do NOT name the file wx.py because the import needs wx, save it as window.py or something else).
Running wxglade code:
Run:
python window.py |
And a window with a button will appear. Pressing the button will not do anything. To start a function when pressing the button, we need to define a so called Callback. This can be as simple as:
def OnButton(self, Event, button_label): print "In OnButton:", button_label |
Finally we bind the button to the callback function using:
self.button_1.Bind(wx.EVT_BUTTON, self.OnButton ) |
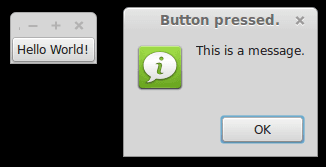
Pressing the button will now write a message to the command line. Instead of the boring command line message, we want to show a message box. This can be done using this command:
wx.MessageBox( "This is a message.", "Button pressed."); |
wxPython example code
The full code below:
#!/usr/bin/env python # -*- coding: UTF-8 -*- # # generated by wxGlade 0.6.8 on Fri Jan 23 22:59:56 2015 # import wx # begin wxGlade: dependencies import gettext # end wxGlade # begin wxGlade: extracode # end wxGlade class MyFrame(wx.Frame): def __init__(self, *args, **kwds): # begin wxGlade: MyFrame.__init__ kwds["style"] = wx.DEFAULT_FRAME_STYLE wx.Frame.__init__(self, *args, **kwds) self.button_1 = wx.Button(self, wx.ID_ANY, _("Hello World!")) self.button_1.Bind(wx.EVT_BUTTON, self.OnButton ) self.__set_properties() self.__do_layout() # end wxGlade def __set_properties(self): # begin wxGlade: MyFrame.__set_properties self.SetTitle(_("wxWidgets button example. pythonspot.com ")) # end wxGlade def __do_layout(self): # begin wxGlade: MyFrame.__do_layout sizer_1 = wx.BoxSizer(wx.VERTICAL) sizer_1.Add(self.button_1, 0, 0, 0) self.SetSizer(sizer_1) sizer_1.Fit(self) self.Layout() # end wxGlade def OnButton(event, button_label): wx.MessageBox( "This is a message.", "Button pressed."); # end of class MyFrame if __name__ == "__main__": gettext.install("app") # replace with the appropriate catalog name app = wx.PySimpleApp(0) wx.InitAllImageHandlers() frame_1 = MyFrame(None, wx.ID_ANY, "") app.SetTopWindow(frame_1) frame_1.Show() app.MainLoop() |