
Tag: gui
tkinter button
The Tkinter library in Python makes it easy to develop interactive desktop applications. One of its versatile features is the ability to display buttons, serving as an interactive interface component. Here, we will explore how to create and customize buttons using this powerful library.
⚙️ Installation Check
Before proceeding, ensure that you’re using the right version of Python. Check your version:
1 | python -- version |
📘 Related Course:
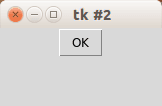
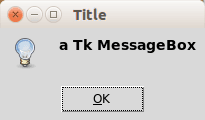
Crafting Simple Buttons
Let’s begin by creating a basic button that prints a message upon clicking:
1 | from Tkinter import * |
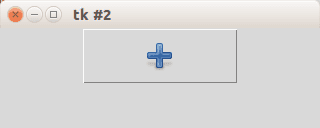
Crafting Image Buttons
Enhance your UI by using buttons with images. Here’s how:
1 | from Tkinter import * |
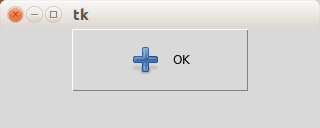
Adding Text Labels to Image Buttons
For a blend of imagery and text, adjust your button like this:
1 | from Tkinter import * |
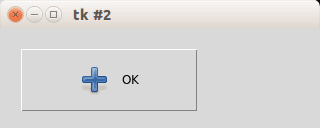
Positioning Buttons on Your GUI
Take control of your button’s position using the place function:
1 | from Tkinter import * |
Want More Insights?
Dive deeper with our downloadable Tkinter examples.
qt message box
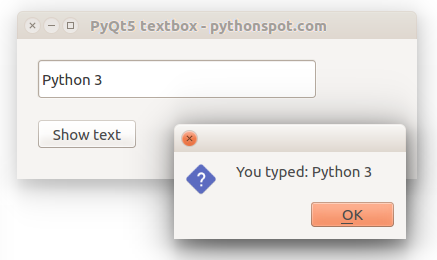
PyQT4 offers message box functionality using several functions.
Messageboxes included in PyQT4 are: question, warning, error, information, criticial and about box.
Related course: Create GUI Apps with Python PyQt5
PyQt4 mesagebox
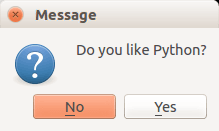
The code below will display a message box with two buttons:#! /usr/bin/env python |
Result:
There are different types of messageboxes that PyQT4 provides.
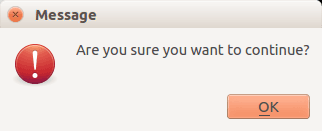
PyQT4 Warning Box
You can display a warning box using this line of code:
QMessageBox.warning(w, "Message", "Are you sure you want to continue?") |
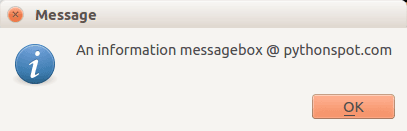
PyQT4 Information box
We can display an information box using QMessageBox.information()
QMessageBox.information(w, "Message", "An information messagebox @ pythonspot.com ") |
Result:
PyQT4 Critical Box
If something goes wrong in your application you may want to display an error message.
QMessageBox.critical(w, "Message", "No disk space left on device.") |
Result:
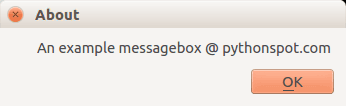
PyQT4 About box
We have shown the question box above.
QMessageBox.about(w, "About", "An example messagebox @ pythonspot.com ") |
Result:
Download PyQT Code (Bulk Collection)
gui in python
To create a graphical interface (GUI) in Python you need to make use of a library or module. There are at least three widely used modules for creating GUIs with Python:
Related course:
GUI toolkits
Tk provides basic widgets such as a button, menu, text and label. It is very limited compared to QT4 and WxPython but it is also the oldest module. It runs on most versions of Mac OS, Linux and Windows.
QT4 and QT5 are developed by the Qt company. Graphical applications made with QT4 or QT5 run on Windows, Linux/X11 and Mac OS X. It has tons of widgets including tabs, buttons, item views, table views, progressbars, input fields, calendar views and many more. Compared to Tk it has a lot more widgets available.
WxPython is a module that creates a native GUI look regardless of the operating system used. On Windows it will look as windows application while on Mac OS it will look as a Mac application. This can be a clear advantage compared to QT4 or Tk, depending on your purpose. WxWidgets has many widgets available such as buttons, menu, text but also more advanced widgets as a htmlview or tree control.
wxPython window
wx.filedialog
tkinter menu bar
Leveraging the Power of the Tkinter Toolkit: Crafting a Main Menu Bar
For many Python GUI applications, the main menu is not just a feature; it’s the nucleus. Being the focal point, it is the bridge that connects users to various app functionalities.
Here’s an illustrative example of what a menu crafted with Tkinter looks like:
Recommended Reading:
Constructing the Tkinter Menubar
Designing an intuitive menu using Tkinter is not a herculean task. Here’s a concise and detailed breakdown of the process. Take note that every menu item, like “New”, “Open”, or “Save”, usually maps to a unique callback function.
1 | from Tkinter import * |
The journey of crafting a main menubar kicks off with this fundamental call:1
menubar = Menu(root)
In this context, root denotes the core Tk() instance.
Menus in graphical interfaces often house a collection of submenus. These can range from File to Edit to View or even Tools. To create these submenus, the pattern remains consistent, utilizing the Menu() call:1
filemenu = Menu(menubar, tearoff=0)
The final step in the process involves populating these submenus with individual menu items using the add_command() method:1
filemenu.add_command(label="New", command=donothing)
In our demo here, the donothing() function is a placeholder callback for each menu item. However, in real-world scenarios, every menu item would point to its specific callback function.
Expand Your Horizons: Dive into an ocean of possibilities with in-depth Tkinter tutorials & samples.
tkinter widgets
tkinter messagebox
pyqt menu
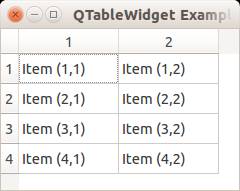
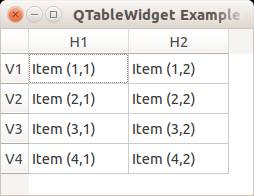
QT4 Table
We can show a table using the QTableWidget, part of the PyQt module. We set the title, row count, column count and add the data.
Related course:
Qt4 Table example
An example below:
from PyQt4.QtGui import * |
Result:
QTableWidget labels
You can set the header using the setHorizontalHeaderLabels() function. The same applies for vertical labels. A qt4 demonstration below:
from PyQt4.QtGui import * |
Result:
Note: These days you can use pyqt5 to create a pyqt table.
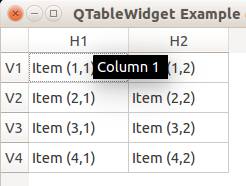
QTableWidget click events
We can detect cell clicks using this procedure, first add a function:
# on click function |
Then define the function:
def cellClick(row,col): |
The Python programming language starts counting with 0, so when you press on (1,1) you will see (0,0). Full code to detect table clicks:
from PyQt4.QtGui import * |
If you want to show the cell/row numbers in a non-programmer way use this instead:
def cellClick(row,col): |
Tooltip text
We can set tooltip (mouse over) text using the method. If you set tooltips on non-existing columns you will get an error.
from PyQt4.QtGui import * |
Result:
Download PyQT Code (Bulk Collection)
pyqt tabs
pyqt display image
progressbar python
pyqt qml
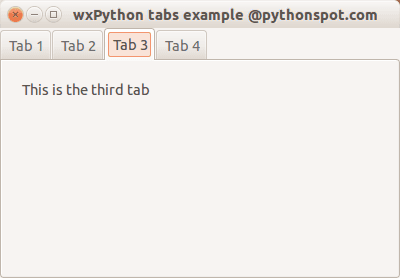
wxpython
The official wxPython site has several screenshots and downloads for these platforms. wxPython is based on wxWidgets.
Related course: Creating GUI Applications with wxPython
Install wxPython
First download and install WxPython, the Python bindings for wxWidgets.sudo apt-get install python-wxgtk2.8 python-wxtools wx2.8-doc wx2.8-examples wx2.8-headers wx2.8-i18n |
Then install a GUI creator called wxglade:
sudo apt-get install wxglade |
Using a GUI builder such as wxGlade will save you a lot of time, regardless of the GUI library you use. You can easily make complex graphical interfaces because you can simply drag and drop.
Creating our first GUI with Python and wxWidgets:
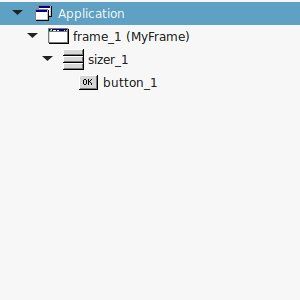
Start wxglade. You will see its user interface:
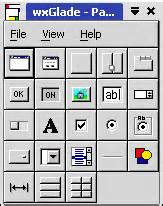
Press on tiny window on the top left, below the file icon.

Press OK. An empty window will now appear. Press on the tiny [OK] button in the wxGlade panel and press on the frame. The button will now appear. Press on Application in the tree window.
Set the output file in the wxproperties window.
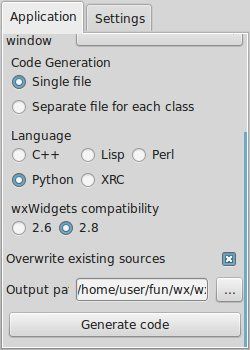
If you look at the window note you can select multiple programming languages and two versions of wxWidgets. Select Python and wxWidgets 2.8. Finally press Generate code. (Do NOT name the file wx.py because the import needs wx, save it as window.py or something else).
Running wxglade code:
Run:
python window.py |
And a window with a button will appear. Pressing the button will not do anything. To start a function when pressing the button, we need to define a so called Callback. This can be as simple as:
def OnButton(self, Event, button_label): |
Finally we bind the button to the callback function using:
self.button_1.Bind(wx.EVT_BUTTON, self.OnButton ) |
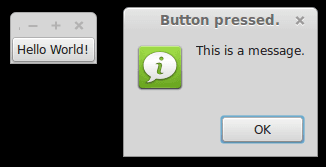
Pressing the button will now write a message to the command line. Instead of the boring command line message, we want to show a message box. This can be done using this command:
wx.MessageBox( "This is a message.", "Button pressed."); |
wxPython example code
The full code below:
#!/usr/bin/env python |
Related course: Creating GUI Applications with wxPython