
Tag: qt4
QT4 Table
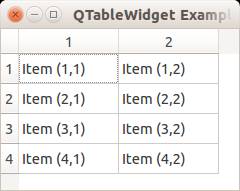
We can show a table using the QTableWidget, part of the PyQt module. We set the title, row count, column count and add the data.
Related course:
Qt4 Table example
An example below:
from PyQt4.QtGui import * |
Result:
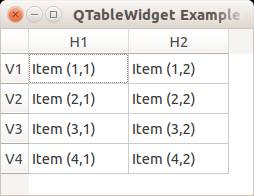
QTableWidget labels
You can set the header using the setHorizontalHeaderLabels() function. The same applies for vertical labels. A demonstration below:
from PyQt4.QtGui import * |
Result:
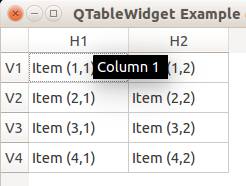
QTableWidget click events
We can detect cell clicks using this procedure, first add a function:
# on click function |
Then define the function:
def cellClick(row,col): |
The Python programming language starts counting with 0, so when you press on (1,1) you will see (0,0). Full code to detect table clicks:
from PyQt4.QtGui import * |
If you want to show the cell/row numbers in a non-programmer way use this instead:
def cellClick(row,col): |
Tooltip text
We can set tooltip (mouse over) text using the method. If you set tooltips on non-existing columns you will get an error.
from PyQt4.QtGui import * |
Result:
Download PyQT Code (Bulk Collection)
pyqt tabs
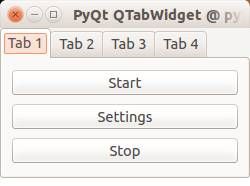
Tabs are very useful in graphical applications. They appear in webbrowsers, text editors and any other apps. To create a tabbed window, you need to call the QTabWidget() function. Every tab is a QWidget() which you have seen before. You can connect the QWidgets with the QTabWidget with the function:
tabs.addTab(tab1,"Tab 1") |
where the first parameter is the tab object and the second the name that appears on the screen. We added some buttons to the first tab (QWidget).
Related course:
Example code:
from PyQt4 import QtGui |
Result:
Download PyQT Code (Bulk Collection)
pyqt display image
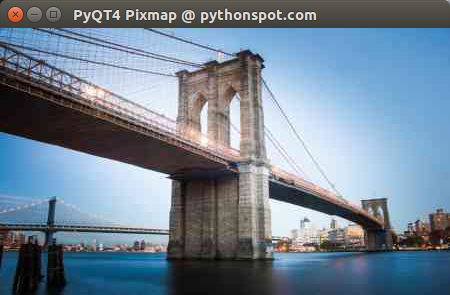
In this article we will demonstrate how to load and display images in an PyQT window. We can display images in a PyQT window using the Pixmap widget.
Related course:
Introduction
The constructor of Pixmap takes the image path as parameter:
pixmap = QPixmap(os.getcwd() + '/logo.png') |
This image needs to be in the same directory as your program. The QPixmap widget supports png and jpeg. Example code below.
PyQT load image in Pixmap
We create a standard QWidget as we have done before. Then we add the QPixmap widget inside which will load the image. The Pixmap is attached to a label which is drawn to the screen.
import os |
Download PyQT Code (Bulk Collection)
Result:
progressbar python
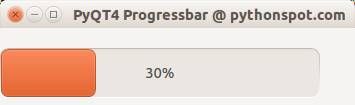
In this article we will demonstrate how to use the progressbar widget. The progressbar is different from the other widgets in that it updates in time.
Related course:
QT4 Progressbar Example
Let’s start with the code:
#! /usr/bin/env python |
The instance bar (of class QProgBar) is used to hold the value of the progressbar. We call the function setValue() to update its value. The parameter w is given to attach it to the main window. We then move it to position (0,20) on the screen and give it a width and height.
To update the progressbar in time we need a QTimer(). We connect the widget with the timer, which calls the function increaseValue(). We set the timer to repeat the function call every 400 milliseconds. You also see the words SLOT and SIGNAL. If a user does an action such as clicking on a button, typing text in a box - the widget sends out a signal. This signal does nothing, but it can be used to connect with a slot, that acts as a receiver and acts on it.
Result:
Download PyQT Code (Bulk Collection)