
Category: pro
Python hosting: Host, run, and code Python in the cloud!
tutorials
Snake with Pygame
 In this tutorial you will learn how to build the game snake. The game is an arcade game and it has very simple logic, which is why it is an ideal example to demonstrate how to build games with Pygame.
The player is represented as snake, which grows if it eats an apple. The goal of the game is to eat as many apples as possible without colliding into yourself. This is very easy in the early phase of the game but is increasingly more difficult as the length of the snake grows.
Getting started: Basic structure and event handling.
We define a class Player which holds the players position on the screen and the speed by which it moves. In addition we define the actions a Player instance can do (movements):
class Player: x = 10 y = 10 speed = 1 def moveRight(self): self.x = self.x + self.speed def moveLeft(self): self.x = self.x - self.speed def moveUp(self): self.y = self.y - self.speed def moveDown(self): self.y = self.y + self.speed |
A player object can be created and variables can be modified using the movement methods.
We link those methods to the events. In Pygame we can get non-blocking keyboard input using this code:
pygame.event.pump() keys = pygame.key.get_pressed() if (keys[K_RIGHT]): print "Right arrow pressed." |
The complete code gives us the ability to move the player across the screen:
from pygame.locals import * import pygame class Player: x = 10 y = 10 speed = 1 def moveRight(self): self.x = self.x + self.speed def moveLeft(self): self.x = self.x - self.speed def moveUp(self): self.y = self.y - self.speed def moveDown(self): self.y = self.y + self.speed class App: windowWidth = 800 windowHeight = 600 player = 0 def __init__(self): self._running = True self._display_surf = None self._image_surf = None self.player = Player() def on_init(self): pygame.init() self._display_surf = pygame.display.set_mode((self.windowWidth,self.windowHeight), pygame.HWSURFACE) pygame.display.set_caption('Pygame pythonspot.com example') self._running = True self._image_surf = pygame.image.load("pygame.png").convert() def on_event(self, event): if event.type == QUIT: self._running = False def on_loop(self): pass def on_render(self): self._display_surf.fill((0,0,0)) self._display_surf.blit(self._image_surf,(self.player.x,self.player.y)) pygame.display.flip() def on_cleanup(self): pygame.quit() def on_execute(self): if self.on_init() == False: self._running = False while( self._running ): pygame.event.pump() keys = pygame.key.get_pressed() if (keys[K_RIGHT]): self.player.moveRight() if (keys[K_LEFT]): self.player.moveLeft() if (keys[K_UP]): self.player.moveUp() if (keys[K_DOWN]): self.player.moveDown() if (keys[K_ESCAPE]): self._running = False self.on_loop() self.on_render() self.on_cleanup() if __name__ == "__main__" : theApp = App() theApp.on_execute() |
You can now move the block around the screen with the arrow keys.
Building the player (snake)
The player controls a snake which has an initial length. This snake is always moving and changes the direction it moves when pressing an arrow key. To do so, update the player class:
class Player: x = 0 y = 0 speed = 32 direction = 0 def update(self): if self.direction == 0: self.x = self.x + self.speed if self.direction == 1: self.x = self.x - self.speed if self.direction == 2: self.y = self.y - self.speed if self.direction == 3: self.y = self.y + self.speed def moveRight(self): self.direction = 0 def moveLeft(self): self.direction = 1 def moveUp(self): self.direction = 2 def moveDown(self): self.direction = 3 |
and don’t forget to add a delay to the game loop.
import time ... time.sleep (100.0 / 1000.0); |
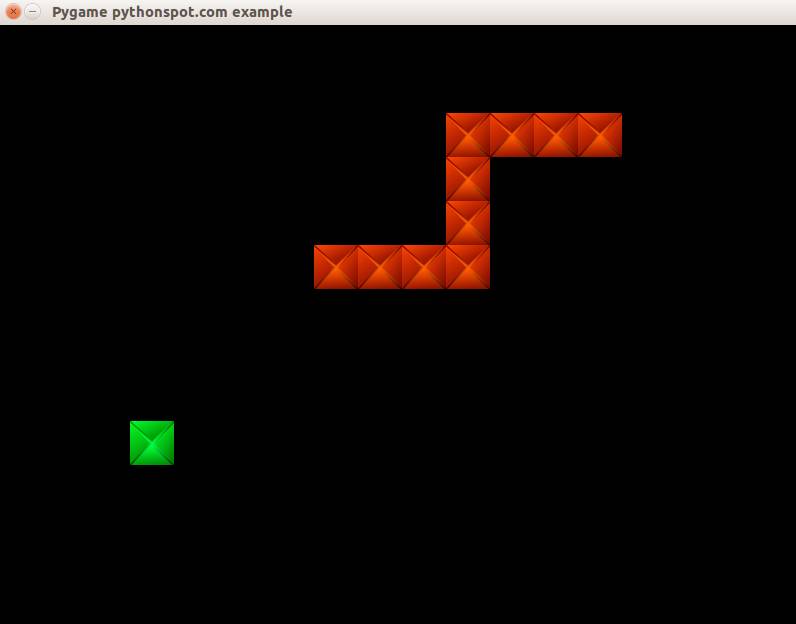
This starts to act more as a snake, but it does not have a base length yet. We keep track of the snakes old positions and move the head of the snake. We also moved the drawing method into the snake. Copy the code and you will have a moving snake:
from pygame.locals import * import pygame import time class Player: x = [] y = [] step = 44 direction = 0 length = 3 updateCountMax = 2 updateCount = 0 def __init__(self, length): self.length = length for i in range(0,length): self.x.append(0) self.y.append(0) def update(self): self.updateCount = self.updateCount + 1 if self.updateCount > self.updateCountMax: # update previous positions for i in range(self.length-1,0,-1): print "self.x[" + str(i) + "] = self.x[" + str(i-1) + "]" self.x[i] = self.x[i-1] self.y[i] = self.y[i-1] # update position of head of snake if self.direction == 0: self.x[0] = self.x[0] + self.step if self.direction == 1: self.x[0] = self.x[0] - self.step if self.direction == 2: self.y[0] = self.y[0] - self.step if self.direction == 3: self.y[0] = self.y[0] + self.step self.updateCount = 0 def moveRight(self): self.direction = 0 def moveLeft(self): self.direction = 1 def moveUp(self): self.direction = 2 def moveDown(self): self.direction = 3 def draw(self, surface, image): for i in range(0,self.length): surface.blit(image,(self.x[i],self.y[i])) class App: windowWidth = 800 windowHeight = 600 player = 0 def __init__(self): self._running = True self._display_surf = None self._image_surf = None self.player = Player(10) def on_init(self): pygame.init() self._display_surf = pygame.display.set_mode((self.windowWidth,self.windowHeight), pygame.HWSURFACE) pygame.display.set_caption('Pygame pythonspot.com example') self._running = True self._image_surf = pygame.image.load("pygame.png").convert() def on_event(self, event): if event.type == QUIT: self._running = False def on_loop(self): self.player.update() pass def on_render(self): self._display_surf.fill((0,0,0)) self.player.draw(self._display_surf, self._image_surf) pygame.display.flip() def on_cleanup(self): pygame.quit() def on_execute(self): if self.on_init() == False: self._running = False while( self._running ): pygame.event.pump() keys = pygame.key.get_pressed() if (keys[K_RIGHT]): self.player.moveRight() if (keys[K_LEFT]): self.player.moveLeft() if (keys[K_UP]): self.player.moveUp() if (keys[K_DOWN]): self.player.moveDown() if (keys[K_ESCAPE]): self._running = False self.on_loop() self.on_render() time.sleep (50.0 / 1000.0); self.on_cleanup() if __name__ == "__main__" : theApp = App() theApp.on_execute() |
Result:
Game logic
The snake game has some rules:
- If the snake eats an apple, the apple moves to a new position.
- If the snake eats an apple, the snakes length grows.
- If a snake collapses with itself, game over.
We start by creating a new class that enables us to create apples:
class Apple: x = 0 y = 0 step = 44 def __init__(self,x,y): self.x = x * self.step self.y = y * self.step def draw(self, surface, image): surface.blit(image,(self.x, self.y)) |
For simplicity sake, we display the apples as green cubes. We have this basic code, but it does not do a lot more than moving the snake and showing the apple:
from pygame.locals import * import pygame import time class Apple: x = 0 y = 0 step = 44 def __init__(self,x,y): self.x = x * self.step self.y = y * self.step def draw(self, surface, image): surface.blit(image,(self.x, self.y)) class Player: x = [] y = [] step = 44 direction = 0 length = 3 updateCountMax = 2 updateCount = 0 def __init__(self, length): self.length = length for i in range(0,length): self.x.append(0) self.y.append(0) def update(self): self.updateCount = self.updateCount + 1 if self.updateCount > self.updateCountMax: # update previous positions for i in range(self.length-1,0,-1): print "self.x[" + str(i) + "] = self.x[" + str(i-1) + "]" self.x[i] = self.x[i-1] self.y[i] = self.y[i-1] # update position of head of snake if self.direction == 0: self.x[0] = self.x[0] + self.step if self.direction == 1: self.x[0] = self.x[0] - self.step if self.direction == 2: self.y[0] = self.y[0] - self.step if self.direction == 3: self.y[0] = self.y[0] + self.step self.updateCount = 0 def moveRight(self): self.direction = 0 def moveLeft(self): self.direction = 1 def moveUp(self): self.direction = 2 def moveDown(self): self.direction = 3 def draw(self, surface, image): for i in range(0,self.length): surface.blit(image,(self.x[i],self.y[i])) class App: windowWidth = 800 windowHeight = 600 player = 0 apple = 0 def __init__(self): self._running = True self._display_surf = None self._image_surf = None self._apple_surf = None self.player = Player(10) self.apple = Apple(5,5) def on_init(self): pygame.init() self._display_surf = pygame.display.set_mode((self.windowWidth,self.windowHeight), pygame.HWSURFACE) pygame.display.set_caption('Pygame pythonspot.com example') self._running = True self._image_surf = pygame.image.load("pygame.png").convert() self._apple_surf = pygame.image.load("apple.png").convert() def on_event(self, event): if event.type == QUIT: self._running = False def on_loop(self): self.player.update() pass def on_render(self): self._display_surf.fill((0,0,0)) self.player.draw(self._display_surf, self._image_surf) self.apple.draw(self._display_surf, self._apple_surf) pygame.display.flip() def on_cleanup(self): pygame.quit() def on_execute(self): if self.on_init() == False: self._running = False while( self._running ): pygame.event.pump() keys = pygame.key.get_pressed() if (keys[K_RIGHT]): self.player.moveRight() if (keys[K_LEFT]): self.player.moveLeft() if (keys[K_UP]): self.player.moveUp() if (keys[K_DOWN]): self.player.moveDown() if (keys[K_ESCAPE]): self._running = False self.on_loop() self.on_render() time.sleep (50.0 / 1000.0); self.on_cleanup() if __name__ == "__main__" : theApp = App() theApp.on_execute() |
We have thus to add the game logic. To know if the snakes position matches the apples position, we have to do collision detection. This simply means veryfing that the cordinate of the snake are intersecting with the coordinates of the apple. We create a new method to do that:
def isCollision(self,x1,y1,x2,y2,bsize): if x1 >= x2 and x1 <= x2 + bsize: if y1 >= y2 and y1 <= y2 + bsize: return True return False |
It will return True if the coordinates (x1,y1) are intersection with (x2,y2) given its block size bsize. We call this method to determine if the snake collides with the apple. We need to check this for the entire snake and not only for the head, because we do not want the new position of the apple to be somewhere on the snake. We use the same isCollision method to determine if the snake collides with itself (= lose game).
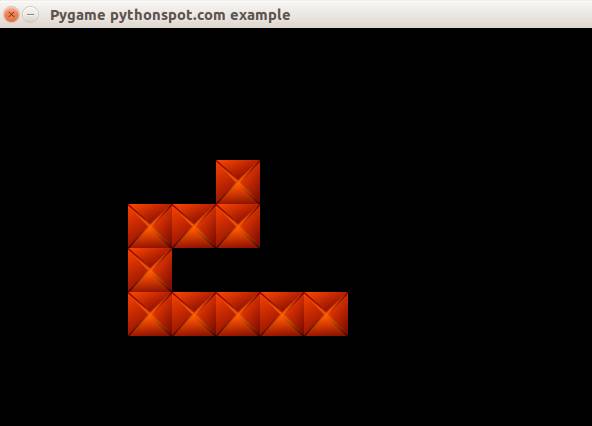
Full source:
from pygame.locals import * from random import randint import pygame import time class Apple: x = 0 y = 0 step = 44 def __init__(self,x,y): self.x = x * self.step self.y = y * self.step def draw(self, surface, image): surface.blit(image,(self.x, self.y)) class Player: x = [0] y = [0] step = 44 direction = 0 length = 3 updateCountMax = 2 updateCount = 0 def __init__(self, length): self.length = length for i in range(0,2000): self.x.append(-100) self.y.append(-100) # initial positions, no collision. self.x[1] = 1*44 self.x[2] = 2*44 def update(self): self.updateCount = self.updateCount + 1 if self.updateCount > self.updateCountMax: # update previous positions for i in range(self.length-1,0,-1): self.x[i] = self.x[i-1] self.y[i] = self.y[i-1] # update position of head of snake if self.direction == 0: self.x[0] = self.x[0] + self.step if self.direction == 1: self.x[0] = self.x[0] - self.step if self.direction == 2: self.y[0] = self.y[0] - self.step if self.direction == 3: self.y[0] = self.y[0] + self.step self.updateCount = 0 def moveRight(self): self.direction = 0 def moveLeft(self): self.direction = 1 def moveUp(self): self.direction = 2 def moveDown(self): self.direction = 3 def draw(self, surface, image): for i in range(0,self.length): surface.blit(image,(self.x[i],self.y[i])) class Game: def isCollision(self,x1,y1,x2,y2,bsize): if x1 >= x2 and x1 <= x2 + bsize: if y1 >= y2 and y1 <= y2 + bsize: return True return False class App: windowWidth = 800 windowHeight = 600 player = 0 apple = 0 def __init__(self): self._running = True self._display_surf = None self._image_surf = None self._apple_surf = None self.game = Game() self.player = Player(3) self.apple = Apple(5,5) def on_init(self): pygame.init() self._display_surf = pygame.display.set_mode((self.windowWidth,self.windowHeight), pygame.HWSURFACE) pygame.display.set_caption('Pygame pythonspot.com example') self._running = True self._image_surf = pygame.image.load("block.jpg").convert() self._apple_surf = pygame.image.load("block.jpg").convert() def on_event(self, event): if event.type == QUIT: self._running = False def on_loop(self): self.player.update() # does snake eat apple? for i in range(0,self.player.length): if self.game.isCollision(self.apple.x,self.apple.y,self.player.x[i], self.player.y[i],44): self.apple.x = randint(2,9) * 44 self.apple.y = randint(2,9) * 44 self.player.length = self.player.length + 1 # does snake collide with itself? for i in range(2,self.player.length): if self.game.isCollision(self.player.x[0],self.player.y[0],self.player.x[i], self.player.y[i],40): print("You lose! Collision: ") print("x[0] (" + str(self.player.x[0]) + "," + str(self.player.y[0]) + ")") print("x[" + str(i) + "] (" + str(self.player.x[i]) + "," + str(self.player.y[i]) + ")") exit(0) pass def on_render(self): self._display_surf.fill((0,0,0)) self.player.draw(self._display_surf, self._image_surf) self.apple.draw(self._display_surf, self._apple_surf) pygame.display.flip() def on_cleanup(self): pygame.quit() def on_execute(self): if self.on_init() == False: self._running = False while( self._running ): pygame.event.pump() keys = pygame.key.get_pressed() if (keys[K_RIGHT]): self.player.moveRight() if (keys[K_LEFT]): self.player.moveLeft() if (keys[K_UP]): self.player.moveUp() if (keys[K_DOWN]): self.player.moveDown() if (keys[K_ESCAPE]): self._running = False self.on_loop() self.on_render() time.sleep (50.0 / 1000.0); self.on_cleanup() if __name__ == "__main__" : theApp = App() theApp.on_execute() |
Conclusion:
You learned how to create the game snake in Python along with concepts such as collision detection, image loading and event handling. Many things could be added to this little toy game but this serves as a very simple example. 🙂
Game development with Pygame

Welcome to the first tutorial of the series: Building games with Pygame. Games you create with Pygame can be run on any machine that supports Python, including Windows, Linux and Mac OS.
In this tutorial we will explain the fundamental of building a game with Pygame. We’ll start of with the basics and will teach you how to create the basic framework. In the next tutorials you will learn how to make certain types of games.
PyGame introduction
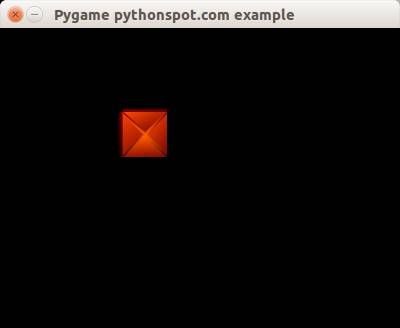
You’ll end up with a program similar to the one on the right:
A game always starts in an order similar to this (pseudo code):
initialize() while running(): game_logic() get_input() update_screen() deinitialize() |
The game starts with initialization. All graphics are loaded, sounds are loaded, levels are loaded and any data that needs to be loaded. The game continues running until it receives a quit event. In this game loop we update the game, get input and update the screen. Depending on the game the implementation widely varies, but this fundamental structure is common in all games.
In Pygame we define this as:
import pygame from pygame.locals import * class App: windowWidth = 640 windowHeight = 480 x = 10 y = 10 def __init__(self): self._running = True self._display_surf = None self._image_surf = None def on_init(self): pygame.init() self._display_surf = pygame.display.set_mode((self.windowWidth,self.windowHeight), pygame.HWSURFACE) self._running = True self._image_surf = pygame.image.load("pygame.png").convert() def on_event(self, event): if event.type == QUIT: self._running = False def on_loop(self): pass def on_render(self): self._display_surf.blit(self._image_surf,(self.x,self.y)) pygame.display.flip() def on_cleanup(self): pygame.quit() def on_execute(self): if self.on_init() == False: self._running = False while( self._running ): for event in pygame.event.get(): self.on_event(event) self.on_loop() self.on_render() self.on_cleanup() if __name__ == "__main__" : theApp = App() theApp.on_execute() |
The Pygame program starts with the constructor __init__(). Once that is finished on_execute() is called. This method runs the game: it updates the events, updates the screen. Finally, the game is deinitialized using on_cleanup().
In the initialiasation phase we set the screen resolution and start the Pygame library:
def on_init(self): pygame.init() self._display_surf = pygame.display.set_mode((self.windowWidth,self.windowHeight), pygame.HWSURFACE) |
We also load the image.
self._image_surf = pygame.image.load("pygame.png").convert() |
This does not draw the image to the screen, that occurs in on_render().
def on_render(self): self._display_surf.blit(self._image_surf,(self.x,self.y)) pygame.display.flip() |
The blit method draws the image (image_surf) to the coordinate (x,y). In Pygame the coordinates start from (0,0) top left to (wind0wWidth, windowHeight). The method call pygame.display.flip() updates the screen.
Continue the next tutorial and learn how to add game logic and build games 🙂
Create a chrome plugin with Python

You can use Python instead of JavaScript and in this tutorial we will show you how to do that.
In a hurry? Download the code from this site:
Download Extension Code
(and scroll down to Method B)
Create an Google Chrome Plugin
To start, we will have to create a manifest file: manifest.json.
{ "manifest_version": 2, "name": "Python Chrome Plugin", "description": "This extension runs Python code.", "version": "1.0", "browser_action": { "default_icon": "icon.png", "default_popup": "popup.html" }, "permissions": [ "activeTab", "https://ajax.googleapis.com/" ] } |
Create a file called popup.html
<!doctype html> <!-- This page is shown when the extension button is clicked, because the "browser_action" field in manifest.json contains the "default_popup" key with value "popup.html". --> <html> <head> <title>Getting Started Extension's Popup</title> <style> body { font-family: "Segoe UI", "Lucida Grande", Tahoma, sans-serif; font-size: 100%; } #status { /* avoid an excessively wide status text */ white-space: pre; text-overflow: ellipsis; overflow: hidden; max-width: 400px; } </style> <!-- - JavaScript and HTML must be in separate files: see our Content Security - Policy documentation[1] for details and explanation. - - [1]: https://developer.chrome.com/extensions/contentSecurityPolicy --> <script src="popup.js"></script> </head> <body> <div id="status"></div> <img id="image-result" hidden> </body> </html> |
Finally get an icon and save it as icon.png. Open chrome://extensions and press developer mode. Press “load unpacked extension”, select your directory and press ok.
Adding Python to the Chrome extension
We have two options to add Python into a chrome extension:
- Method A: Include Brython in an iframe (requires server)
- Method B: Compile Python to Javascript using Rapydscript (best, serverless, pure extension.)
Method A: Python (Brython) in iframe
Now that you have the basics right we can add Python to the code. To run Python in the browser you have several options including Brython and emcascripten. We decided to give Brython a try. We will run the Brython script from a server. Change popup.html to:
<!DOCTYPE html PUBLIC "-//W3C//DTD HTML 4.01 Transitional//EN"> <html> <head> <meta charset="iso-8859-1"> <style> body { margin: 0 !important; padding: 0 !important; width: 800; } #frame { overflow: hidden; width:790; height:324; } </style> </head> <body onLoad=""> <iframe src=http://brython.info/console.html id="frame" seamless="seamless" scrolling="no"></iframe> </body> </html> |
Once you restart your plugin you will have a Python (Brython) interpreter inside your Google Chrome.
Running your own scripts
To run your own script simply change the url inside the popup.html frame:
<iframe src="BRYTHON SCRIPT URL" id="frame" seamless="seamless" scrolling="no"></iframe> |
The script should run on your own server. You can run any Brython script from the web. Using Brython you can simply type Python code inside the script tags. Have a look at this Brython examples or simply browse the gallery.
Method B: Compile Python to Javascript. (no server, pure extension)
There are several tools to compile Python to Javascript. Rapydscript works fine, Pyjs does not work well with chrome (requires special parameter on start).
Install Rapydscript with:
sudo apt-get install npm sudo ln -s /usr/bin/nodejs /usr/bin/node sudo npm install rapydscript |
Download the code from this site:
Download Extension Code
Change the file /src/hello.py to you needs:
# Example Python script # (for rapydscript, a python to javascript compiler) #def doHelloMessage(): # alert('hello') #doHelloMessage() # modify html page document.getElementById("result").innerHTML = 'Compiled Python script in Chrome' # write into log console.log('hello from python') |
Run:
./make.sh |
You can find your extension in /compiledpythonextension/. Load it in chrome as unpackaged extension and see it working 🙂
Concluding:
Chrome plugins are created using HTML, JavaScript and CSS. We can use Python to create normal Chrome extensions using a Python to Javascript compiler (Rapydscript).
Leave a comment 🙂
Face detection in Google Hangouts video
In this tutorial you will learn how to apply face detection with Python. As input video we will use a Google Hangouts video. There are tons of Google Hangouts videos around the web and in these videos the face is usually large enough for the software to detect the faces.
Detection of faces is achieved using the OpenCV (Open Computer Vision) library. The most common face detection method is to extract cascades. This technique is known to work well with face detection. You need to have the cascade files (included in OpenCV) in the same directory as your program.
To analyse the input video we extract each frame. Each frame is shown for a brief period of time. Start with this basic program:
#! /usr/bin/python import cv2 vc = cv2.VideoCapture('video.mp4') c=1 fps = 24 if vc.isOpened(): rval , frame = vc.read() else: rval = False while rval: rval, frame = vc.read() cv2.imshow("Result",frame) cv2.waitKey(1000 / fps); vc.release() |
Upon execution you will see the video played without sound. (OpenCV does not support sound). Inside the while loop we have every video frame inside the variable frame.
Face detection with OpenCV
We will display a rectangle on top of the face. To avoid flickering of the rectangle, we will show it at it latest known position if the face is not detected.
#! /usr/bin/python import cv2 face_cascade = cv2.CascadeClassifier('lbpcascade_frontalface.xml') vc = cv2.VideoCapture('video.mp4') if vc.isOpened(): rval , frame = vc.read() else: rval = False roi = [0,0,0,0] while rval: rval, frame = vc.read() # resize frame for speed. frame = cv2.resize(frame, (300,200)) # face detection. faces = face_cascade.detectMultiScale(frame, 1.8, 2) nfaces = 0 for (x,y,w,h) in faces: cv2.rectangle(frame,(x,y),(x+w,y+h),(0,0,255),2) nfaces = nfaces + 1 roi = [x,y,w,h] # undetected face, show old on position. if nfaces == 0: cv2.rectangle(frame,(roi[0],roi[1]),(roi[0]+roi[2],roi[1]+roi[3]),(0,0,255),2) # show result cv2.imshow("Result",frame) cv2.waitKey(1); vc.release() |
In this program we simply assumed there is one face in the video screen. We reduced the size of the screen to speed up the processing time. This is fine in most cases because detection will work fine in lower resolutions. If you want to execute the face detection in “real time”, keeping the computational cycle short is mandatory. An alternative to this implementation is to process first and display later.
A limitation of this technique is that it does not always detect faces and faces that are very small or occluded may not be detected. It may show false positives such as a bag detected as face. This technique works quite well on certain type of input videos.
Create and read csv
Spreadsheets often export CSV (comma seperated values) files, because they are easy to read and write. A csv file is simply consists of values, commas and newlines. While the file is called ‘comma seperate value’ file, you can use another seperator such as the pipe character.
Related course
Data Analysis with Python Pandas
Create a spreadsheet file (CSV) in Python
Let us create a file in CSV format with Python. We will use the comma character as seperator or delimter.
import csv with open('persons.csv', 'wb') as csvfile: filewriter = csv.writer(csvfile, delimiter=',', quotechar='|', quoting=csv.QUOTE_MINIMAL) filewriter.writerow(['Name', 'Profession']) filewriter.writerow(['Derek', 'Software Developer']) filewriter.writerow(['Steve', 'Software Developer']) filewriter.writerow(['Paul', 'Manager']) |
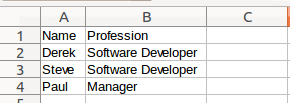
Running this code will give us this fil persons.csv with this content:
Name,Profession Derek,Software Developer Steve,Software Developer Paul,Manager |
You can import the persons.csv file in your favorite office program.
Read a spreadsheet file (csv)
If you created a csv file, we can read files row by row with the code below:
import csv # open file with open('persons.csv', 'rb') as f: reader = csv.reader(f) # read file row by row for row in reader: print row |
This will simply show every row as a list:
['Name', 'Profession'] ['Derek', 'Software Developer'] ['Steve', 'Software Developer'] ['Paul', 'Manager'] |
Perhaps you want to store that into Python lists. We get the data from the csv file and then store it into Python lists. We skip the header with an if statement because it does not belong in the lists. Full code:
import csv # create list holders for our data. names = [] jobs = [] # open file with open('persons.csv', 'rb') as f: reader = csv.reader(f) # read file row by row rowNr = 0 for row in reader: # Skip the header row. if rowNr >= 1: names.append(row[0]) jobs.append(row[1]) # Increase the row number rowNr = rowNr + 1 # Print data print names print jobs |
Result:
['Derek', 'Steve', 'Paul'] ['Software Developer', 'Software Developer', 'Manager'] |
Most spreadsheet or office programs can export csv files, so we recommend you to create any type of csv file and play around with it 🙂
Regular Expressions
Regular expressions are essentially a highly specialized programming language embedded inside Python that empowers you to specify the rules for the set of possible strings that you want to match.
In Python you need the re module for regular expressions usage. The grammar overview is on the bottom of this page.
Related course:
Python Programming Bootcamp: Go from zero to hero
The Match function
The match function is defined as:
re.match(pattern, string) |
The parameters are:
| Parameters | Description |
|---|---|
| pattern | a regular expression |
| string | the input string |
If you want to match a string to a numberic sequence of exactly five, you can use this code:
#!/usr/bin/python import re input = raw_input("Enter an input string:") m = re.match('\d{5}\Z',input) if m: print("True") else: print("False") |
Example outputs:
| String | Match |
|---|---|
| 12345 | True |
| 12358 | True |
| 55555 | True |
| 123 | False |
| 123K5 | False |
| 5555555 | False |
Email validation regex
We can use the same function to validate email address. The grammar rules are seen in re.compile and in the grammar table.
#!/usr/bin/python import re input = raw_input("Enter an input string:") m = re.match('[^@][email protected][^@]+\.[^@]+',input) if m: print("True") else: print("False") |
The Search Function
The search function is defined as:
re.search(pattern, string) |
The parameters are:
| Parameter | Description |
|---|---|
| pattern | a regular expression, defines the string to be searched |
| string | the search space |
To search if an e-mail address is in a string:
#!/usr/bin/python import re input = "Contact me by [email protected] or at the office." m = re.search('[^@][email protected][^@]+\.[^@]+',input) if m: print("String found.") else: print("Nothing found.") |
Regular Expression Examples
A few examples of regular expressions:
| Example | Regex |
|---|---|
| IP address | (([2][5][0-5]\.)|([2][0-4][0-9]\.)|([0-1]?[0-9]?[0-9]\.)){3}(([2][5][0-5])|([2][0-4][0-9])|([0-1]?[0-9]?[0-9])) |
| [^@][email protected][^@]+\.[^@]+ | |
| Date MM/DD/YY | (\d+/\d+/\d+) |
| Integer (positive) | (?<![-.])\b[0-9]+\b(?!\.[0-9]) |
| Integer | [+-]?(?<!\.)\b[0-9]+\b(?!\.[0-9]) |
| Float | (?<=>)\d+.\d+|\d+ |
| Hexadecimal | \s–([0-9a-fA-F]+)(?:–)?\s |
Regular Expression Grammar
Overview of the regex grammar:
| Regex | Description |
|---|---|
| \d | Matches any decimal digit; this is equivalent to the class [0-9] |
| \D | Matches any non-digit character; this is equivalent to the class [^0-9]. |
| \s | Matches any whitespace character; this is equivalent to the class [ \t\n\r\f\v]. |
| \S | Matches any non-whitespace character; this is equivalent to the class [^ \t\n\r\f\v]. |
| \w | Matches any alphanumeric character; this is equivalent to the class [a-zA-Z0-9_]. |
| \W | Matches any non-alphanumeric character; this is equivalent to the class [^a-zA-Z0-9_]. |
| \Z | Matches only at end of string |
| [..] | Match single character in brackets |
| [^..] | Match any single character not in brackets |
| . | Match any character except newline |
| $ | Match the end of the string |
| * | Match 0 or more repetitions |
| + | 1 or more repetitions |
| {m} | Exactly m copies of the previous RE should be matched. |
| | | Match A or B. A|B |
| ? | 0 or 1 repetitions of the preceding RE |
| [a-z] | Any lowercase character |
| [A-Z] | Any uppercase character |
| [a-zA-Z] | Any character |
| [0-9] | Any digit |