
PyQt5 Treeview
PyQt5 (python with qt5 bindings) supports a tree view widget (class QTreeView). In this article we will show how to use the widget.
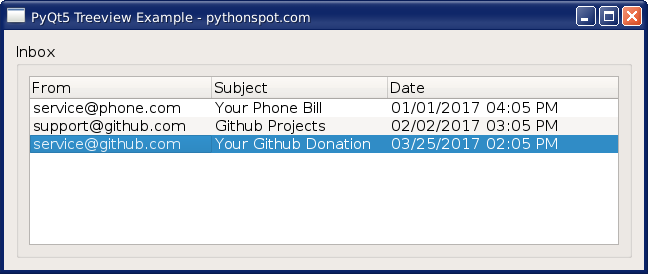
The image shows a QTreeView widget with data inside it.
Related course:
Practice Python with interactive exercises
PyQt5 Treeview Example
The code below will create a treeview using the QTreeView class (Run using Python 3). Data is added to the treeview by code. Explanation of the code is below the code block.#!/usr/bin/env python3
# -*- coding: utf-8 -*-
import sys
from PyQt5.QtGui import QIcon
from PyQt5.QtCore import (QDate, QDateTime, QRegExp, QSortFilterProxyModel, Qt,
QTime)
from PyQt5.QtGui import QStandardItemModel
from PyQt5.QtWidgets import (QApplication, QCheckBox, QComboBox, QGridLayout,
QGroupBox, QHBoxLayout, QLabel, QLineEdit, QTreeView, QVBoxLayout,
QWidget)
class App(QWidget):
FROM, SUBJECT, DATE = range(3)
def __init__(self):
super().__init__()
self.title = 'PyQt5 Treeview Example - pythonspot.com'
self.left = 10
self.top = 10
self.width = 640
self.height = 240
self.initUI()
def initUI(self):
self.setWindowTitle(self.title)
self.setGeometry(self.left, self.top, self.width, self.height)
self.dataGroupBox = QGroupBox("Inbox")
self.dataView = QTreeView()
self.dataView.setRootIsDecorated(False)
self.dataView.setAlternatingRowColors(True)
dataLayout = QHBoxLayout()
dataLayout.addWidget(self.dataView)
self.dataGroupBox.setLayout(dataLayout)
model = self.createMailModel(self)
self.dataView.setModel(model)
self.addMail(model, '[email protected]', 'Your Github Donation','03/25/2017 02:05 PM')
self.addMail(model, '[email protected]', 'Github Projects','02/02/2017 03:05 PM')
self.addMail(model, '[email protected]', 'Your Phone Bill','01/01/2017 04:05 PM')
mainLayout = QVBoxLayout()
mainLayout.addWidget(self.dataGroupBox)
self.setLayout(mainLayout)
self.show()
def createMailModel(self,parent):
model = QStandardItemModel(0, 3, parent)
model.setHeaderData(self.FROM, Qt.Horizontal, "From")
model.setHeaderData(self.SUBJECT, Qt.Horizontal, "Subject")
model.setHeaderData(self.DATE, Qt.Horizontal, "Date")
return model
def addMail(self,model, mailFrom, subject, date):
model.insertRow(0)
model.setData(model.index(0, self.FROM), mailFrom)
model.setData(model.index(0, self.SUBJECT), subject)
model.setData(model.index(0, self.DATE), date)
if __name__ == '__main__':
app = QApplication(sys.argv)
ex = App()
sys.exit(app.exec_())
Treeview Explanation
We create a new tree view object using the line:self.dataView = QTreeView()The view is set to have a model,
self.dataView.setModel(model)Where model is
model = QStandardItemModel(0, 3, parent)
model.setHeaderData(self.FROM, Qt.Horizontal, "From")
model.setHeaderData(self.SUBJECT, Qt.Horizontal, "Subject")
model.setHeaderData(self.DATE, Qt.Horizontal, "Date")Then we add data using:
model.insertRow(0)
model.setData(model.index(0, self.FROM), mailFrom)
model.setData(model.index(0, self.SUBJECT), subject)
model.setData(model.index(0, self.DATE), date)