
Category: pyqt5
pyqt5 window
If you do not have PyQT5 installed, you should install it first.
In a terminal you can type:
|
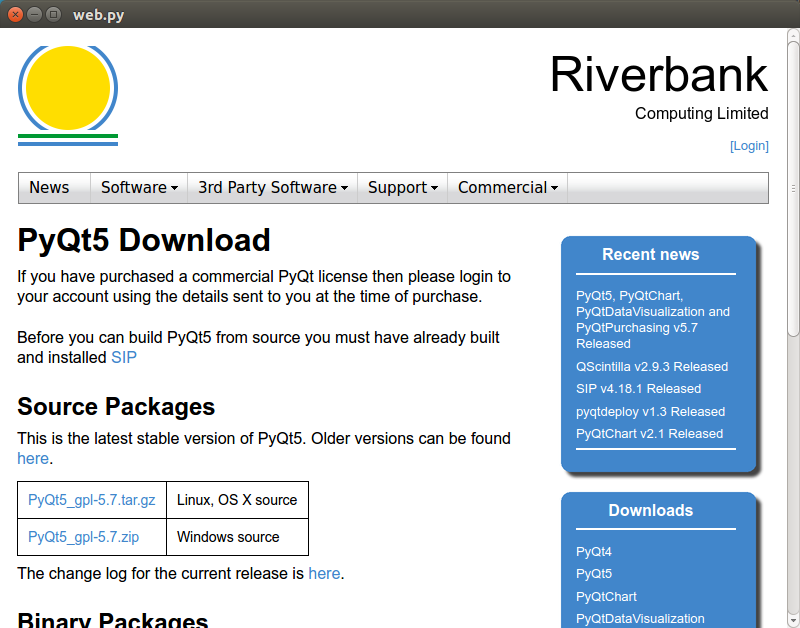
If you are on a Windows or Mac computer, you can download PyQT5 from: https://www.riverbankcomputing.com/software/pyqt/download5
Related courses:
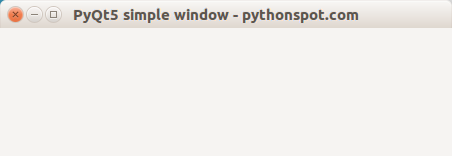
PyQt5 window
You can create a PyQT5 window using the code below:
|
We set the window size using the setGeometry(left,top,width,height) method. The window title is set using setWindowTitle(title). Finally show() is called to display the window.
Run with:
|
If you are new to programming Python PyQt, I highly recommend this book.
The output should look similar to the screenshot above (depending on your operating system).
pyqt statusbar
PyQt5 supports a window status bar. This is a small bar at the bottom of a window that sometimes appears, it can contain text messages. To add a status bar add the line:
|
A statusbar can be added to the main window (QMainWindow). It is one of the methods the class itself contains;
Related course:
Create GUI Apps with PyQt5
PyQt5 statusbar example:
The program below adds a statusbar to a PyQt5 window:
|
The example creates a window (QMainWindow). We set the screen parameters using:
|
Window properties are set in the initUI() method which is called in the constructor. The method:
|
sets the text on the statusbar.
If you are new to programming Python PyQt, I highly recommend this book.
pyqt5 button
pyqt5 signals
Graphical applications (GUI) are event-driven, unlike console or terminal applications. A users action like clicks a button or selecting an item in a list is called an event.
If an event takes place, each PyQt5 widget can emit a signal. A signal does not execute any action, that is done by a slot.
Related course:
Create GUI Apps with PyQt5
Signals and slot introduction
Consider this example:
|
The button click (signal) is connected to the action (slot). In this example, the method slot_method will be called if the signal emits.
This principle of connecting slots methods or function to a widget, applies to all widgets,
|
or we can explicitly define the signal:
|
PyQt supports many type of signals, not just clicks.
Example
We can create a method (slot) that is connected to a widget. A slot is any callable function or method.
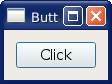
On running the application, we can click the button to execute the action (slot).
|
The button is added to a qvboxlayout.
If you are new to programming Python PyQt, I highly recommend this book.
pyqt5 messagebox
In this article you will learn how to create a PyQt5 messagebox:
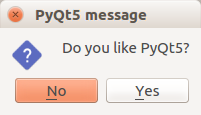
A message box is a class to show a small dialog with an ordinary message, an information message, or a question and it can confirm one or two choices.
A message box can be created using the class QMessageBox. This class provides a modal dialog with a short text, an icon, and buttons. The class has method show() display a message box and return immediately.
To show a messagebox we need to import QMessageBox.
|
We use the method QMessageBox.question() to display the messagebox.
Related course: Create GUI Apps with PyQt5
PyQt5 messagebox code
Copy the code below to display a messagebox.
|
More buttons for a messagebox
Take into account we use QMessageBox.Yes and QMessageBox.No. We can easily add other options:
|
The available buttons are:
| Overview | ||
| QMessageBox.Cancel | QMessageBox.Ok | QMessageBox.Help |
| QMessageBox.Open | QMessageBox.Save | QMessageBox.SaveAll |
| QMessageBox.Discard | QMessageBox.Close | QMessageBox.Apply | QMessageBox.Reset | QMessageBox.Yes | QMessageBox.YesToAll |
| QMessageBox.No | QMessageBox.NoToAll | QMessageBox.NoButton |
| QMessageBox.RestoreDefaults | QMessageBox.Abort | QMessageBox.Retry |
| QMessageBox.Ignore |
If you are new to programming Python PyQt, I highly recommend this book.
pyqt5 text box
qwidget set position
pyqt5 menu
pyqt table
In this article you will learn how to use tables with PyQt5. You can add one or more tables to any PyQt application or window.
Tables can have multiple rows and columns. This can be specified with setRowCount() and setColumnCount().

To add a table, you will need to import QTableWidget and QTableWidgetItem.
Related course:
Example
|
A table is created with:
|
To add individual cells:
|
PyQt5 table example
The full PyQt5 table code is below. The table is added to a qvboxlayout. Then a double click is attached to a slot using a pyqtslot.
|
If you are new to programming Python PyQt, I highly recommend this book.
pyqt tabs
pyqt5 layout
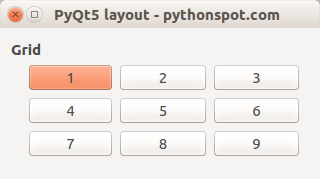
pyqt grid layout
PyQt5 supports a grid layout, which is named QGridLayout. Widgets can be added to a grid in both the horizontal and vertical direction. An example of a grid layout with widgets is shown below:
Related course:
PyQt5 grid layout example:
The example below creates the grid:
|
Explanation
We import the gridlayout and others with:
|
In the method createGridLayout() we create the grid with a title and set the size.
|
Widgets are added using
|
Finally we set the layout.
Several buttons are added to the grid. To add a button click action you need a pyqtslot.
If you are new to programming Python PyQt, I highly recommend this book.
qinputdialog pyqt5
PyQt5 supports several input dialogs, to use them import QInputDialog.
|
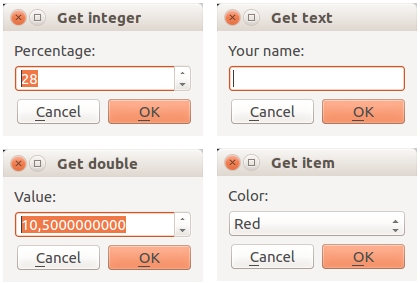
An overview of PyQt5 input dialogs:
Related course:
Get integer
Get an integer with QInputDialog.getInt():
|
Parameters in order: self, window title, label (before input box), default value, minimum, maximum and step size.
Get double
Get a double with QInputDialog.getDouble():
|
The last parameter (10) is the number of decimals behind the comma.
Get item/choice
Get an item from a dropdown box:
|
Get a string
Get a string using QInputDialog.getText()
|
There are many more widgets (qwidget) and showing dialogs is only one of the things you can do.
Example all PyQt5 input dialogs
Complete example below:
|
If you are new to programming Python PyQt, I highly recommend this book.
qfiledialog pyqt5
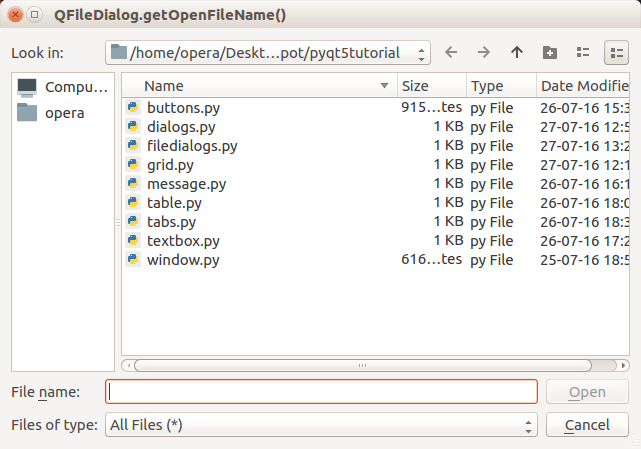
PyQt5 supports (native) file dialogs: open file, open files and save file. By calling the functions included in PyQt5 you get the default file dialog, you don’t have to recreate these dialogs from scratch.
Importing QFileDialog is required.
Related course:
File dialog example
The methods used are QFileDialog.getOpenFileName(), QFileDialog.getOpenFileNames(), QFileDialog.getSaveFileName(). The method parameters let you specify the default directory, filetypes and the default filename.
The code below will show all file dialogs:
|
If you are new to programming Python PyQt, I highly recommend this book.
qpixmap pyqt5
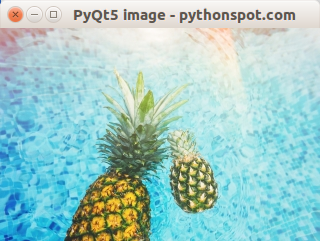
PyQt5 (and Qt) support images by default. In this article we’ll show you how to add an image to a window. An image can be loaded using the QPixmap class.
Related course:
PyQt5 image introduction
Adding an image to a PyQt5 window is as simple as creating a label and adding an image to that label. You can load an image into a QPixmap. A QPixmap can be used to display an image in a PyQt window.
To load an image from a file, you can use the QPixmap.load() method. This will return a True or False value depending on whether the image was successfully loaded.
Once you have loaded an image into a QPixmap, you can then display it by creating a QLabel and setting the pixmap property of the label to the QPixmap.
|
These are the required imports:
|
PyQt5 load image (QPixmap)
Copy the code below and run it. The image should be in the same directory as your program.
|
If you are new to programming Python PyQt, I highly recommend this book.
pyqt5 qpainter
pyqt color picker
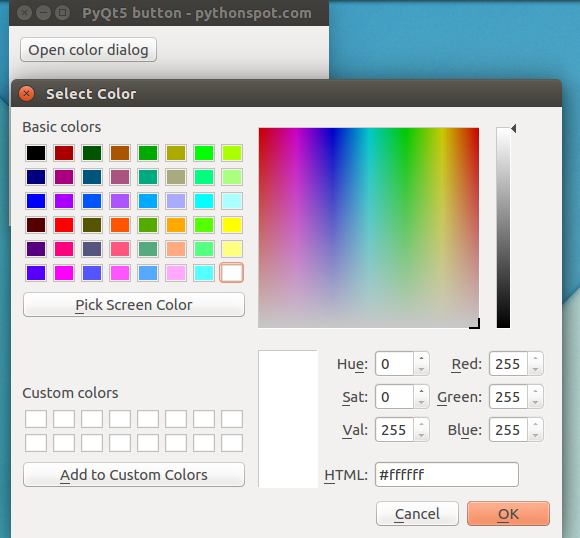
PyQt5 supports a color picker known as QColorDialog. This dialog is a typical dialog that you would see in a paint or graphics program.
To get a color from PyQt5 dialog simply call:
|
Related course:
PyQt5 color dialog example
The example below opens a QColorDialog after clicking the button (qpushbutton), and returns the selected color.
|
If you are new to programming Python PyQt, I highly recommend this book.
qcolor pyqt5
pyqt drag and drop
Like any modern GUI toolkit, PyQt supports drag and drop. A widget parameter must be set using the setDragEnabled(True) method call. A custom widget should then be set to accept a drop with setAcceptDrops(True).
Related course:
Create GUI Apps with PyQt5
PyQt5 drag and drop example
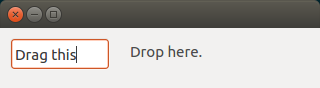
Drag text from the input field to the label, the label will update its text. Use pyqtslot to connect the action to a function.
|
If you are new to programming Python PyQt, I highly recommend this book.
The textbox is created with the call QLineEdit(). A custom class (CustomLabel) is created that accepts drag and drop. Both events are defined as methods and have their logic executed if the event occurs.
pyqt5 font
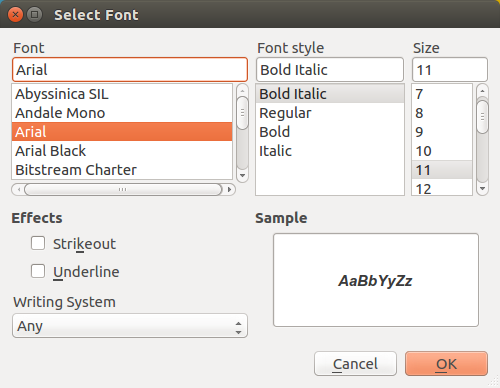
PyQt5 comes with a font dialog that you may have seen in a text editor. This is the typical dialog where you can select font, font size, font style and so on. Of course the look and feel depends on the operating system.
To open this dialog import QFontDialog call:
QFontDialog.getFont() |
To use it, import QFontDialog from QtWidgets like this:
from PyQt5.QtWidgets import QApplication, QWidget, QPushButton, QFontDialog |
Related course:
PyQt5 font dialog
The example below opens a font dialog on a button event, the selected font (font family including size) will be returned as a string.
Opening a font dialog is as simple as
def openFontDialog(self): |
Then add a pyqt5 button that opens the dialog. To do that, you need a pyqtslot.
A full code example is shown below
|
If you are new to programming Python PyQt, I highly recommend this book.
pyqt5 matplotlib
Matplotlib offers powerful visualizations that can be seamlessly integrated into a PyQt5 application. For this, specific libraries and imports are required.
Here’s how you can include Matplotlib plots within a PyQt5 application:
from matplotlib.backends.backend_qt5agg import FigureCanvasQTAgg as FigureCanvas |
The primary component here is a widget named ‘PlotCanvas’ which houses the Matplotlib visualization.
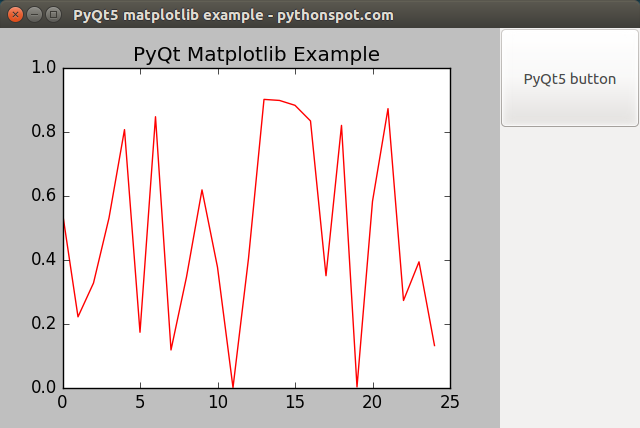
Integration of Matplotlib with PyQt5
The example provided below illustrates the embedding process of a Matplotlib plot within a PyQt5 window. Additionally, we’ll integrate a qpushbutton for demonstration.
import sys |
For those keen on diving deeper into PyQt5’s capabilities, consider downloading these comprehensive PyQT5 Example Codes.
Navigation:
pyqt5 browser
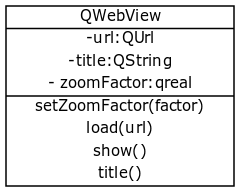
PyQt5 supports a widget that displays websites named QWebView.
QWebView uses the Webkit rendering engine
The web browser engine is used by Safari, App Store and many OS X applications.
The load() method opens the url (QUrl) in the argument. You can create a QUrl using: QUrl(url).
The show() method is required to display the widget.
Related course:
Installation
To use this widget you may need to install an additional package:
|
Read more about PyQt5.
PyQt5 webkit example
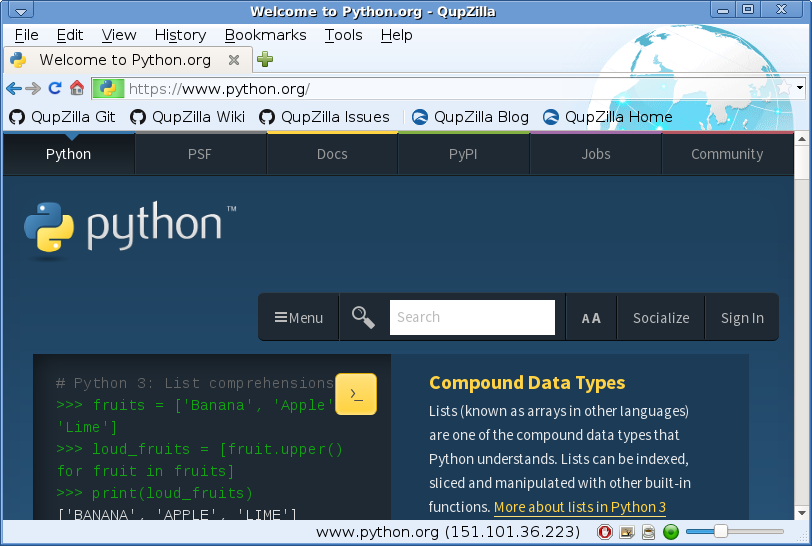
The example below loads a webpage in a PyQt5 window.
|
pyqt5 webview
PyQt5 comes with a webkit webbrowser. Webkit is an open source web browser rendering engine that is used by Apple Safari and others. It was used in the older versions of Google Chrome, they have switched to the Blink rendering engine.
Related course:
Create GUI Apps with PyQt5
QWebView
The widget is called QWebView and webpages (HTML content) can be shown through this widget, local or live from the internet.
Methods
The QWebView class comes with a lot of methods including:
- back (self)
- forward (self)
- load (self, QUrl url)
- reload (self)
|
Related course:
Create GUI Apps with PyQt5
pyqt treeview
pyqt treeview
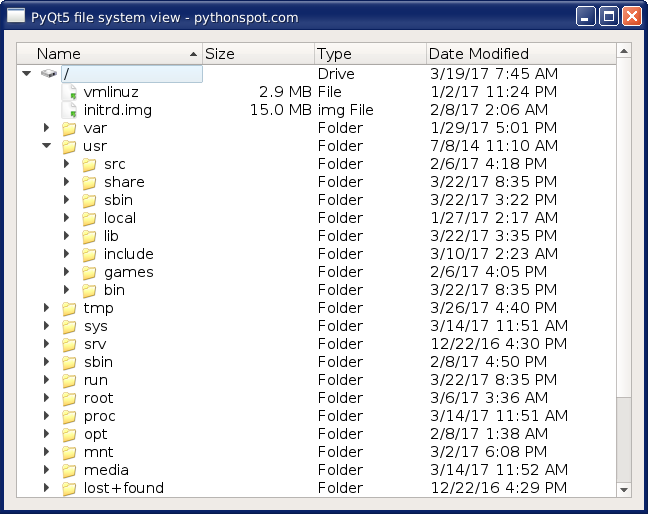
PyQt can show a directory structure using a QTreeView. For the treeview to show as a directory tree, we need to set its model to a QFileSystemModel instance. That is achieved by calling the setModel method for the tree instance.
We can set additional options on the tree object: sorting enabled (setSortingEnabled), animation and indention.
Related course:
Example
The code below will add the directory view (QTreeView combined with QFileSystemModel) to a grid window. A layout needs to be set for the widget to be seen.
The path is specified using the models setRootPath() method, where the parameter is the full path to the directory. By default its the root.
For layout we use a qvboxlayout.
|
If you are new to programming Python PyQt, I highly recommend this book.
qformlayout
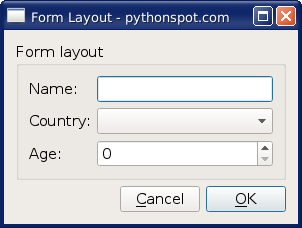
A form can be created using the class QFormLayout. This is the easiest way to create a form where widgets (input) have descriptions (labels).
In this article we’ll show you how to create a form with pyqt.
Related course:
Form Layout Example
The Form Layout is created using the class QFormLayout. We can add rows to the form using the method addRow. The method is defined as
|
We call the method using two widgets where the first is the label and the second the type of qwidget.
|
If you are new to programming Python PyQt, I highly recommend this book.
qboxlayout
python wizard
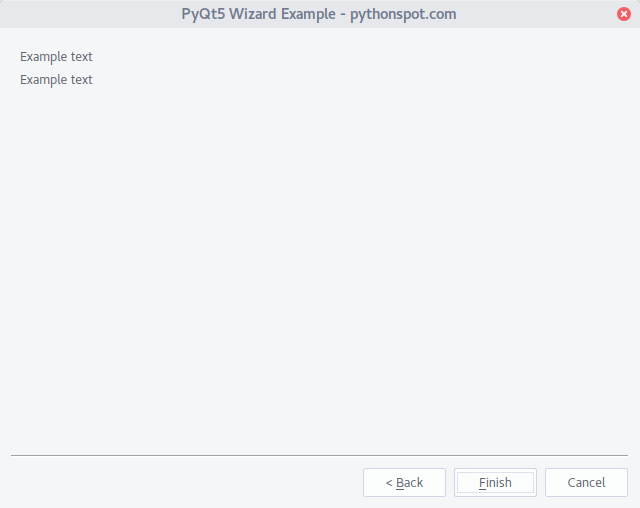
A wizard is a screen you often see during installations, you have back and next buttons, and are guided through a process.
In PyQt5 these are called pages, every page can have some content. The buttons will guide you through these pages.
Related course:
Wizard Example
The code below creates a wizard in PyQt:
|
Screenshot:
For every page you can add a new class, where inside the method initializePage you can set the widgets. Inside the class MagicWizard add or remove pages.