Tag: python
Introduction
python if string equals
A string in Python represents a sequence of characters and is a fundamental data type in the language. Strings are predominantly utilized for displaying and manipulating text.
Strings can be defined by enclosing text within quotes. Python supports various types of quotes, including single ('), double ("), and triple (''' or """).
Related Course:
Python Programming Bootcamp: Go from zero to hero
Displaying and Receiving String Input
To display a string on the screen, you can use the
print function. For instance:
s = "hello world" |
If you need to retrieve a string input from the user via the keyboard, the input function comes in handy:
name = input("Enter name: ") |
Note: If you are utilizing an older version of Python (2.x), the raw_input function is used instead of input:
name = raw_input("Enter name: ") |
To ascertain your Python version, you can execute the command:
python –version
Comparing Strings in Python
In Python, the equality operator (
==) lets you check if two strings are identical. For example:
sentence = "The cat is brown" |
Conversely, to see if two strings are different, employ the inequality operator (!=):
sentence = "The cat is brown" |
Enhance your Python skills further with exercises:
Download Python Exercises
For more tutorials, navigate:
variables in python
python function
Python functions are powerful tools in programming. They enable you to create reusable blocks of code, thereby enhancing the efficiency and readability of your programs.
Python is renowned for its simplicity and functions play a vital role in this. By leveraging functions, programmers can reduce repetition, increase code clarity, and simplify testing and modifications.
Related Course:
Python Programming Bootcamp: Go from zero to hero
Understanding Python Functions
To comprehend the power and structure of functions in Python, it’s essential to first understand their syntax and formation.
In Python, the def keyword signals the beginning of a function. This is followed by the function name and any parameters the function might need. The body of the function contains the operations to be carried out, and the function may or may not return a value.
Here’s a basic structure:
def function_name(parameters): |
A Simple Python Function in Action
To illustrate, let’s look at a function that calculates the square of a number.
#!/usr/bin/python |
This will produce the output:
9 |
The above example demonstrates a function with a single parameter, x. It’s worth noting that while functions can return a value (like our square function), not all functions are required to.
Delving Deeper: Multiple Parameters in Python Functions
Functions in Python can be more intricate. They can accept multiple parameters, making them incredibly versatile.
Consider this example:
#!/usr/bin/python |
The output will be:
You called multiply(x,y) with the values x = 3 and y = 2 |
The key takeaway here is the versatility of functions in Python. Whether you’re working with a single parameter or multiple ones, Python functions are designed to streamline your programming efforts.
Dive deeper with Python exercises here
dbms in python
In this tutorial you will learn how to use the SQLite database management system with Python. You will learn how to use SQLite, SQL queries, RDBMS and more of this cool stuff!
Related course: Master SQL Databases with PythonPyton Database
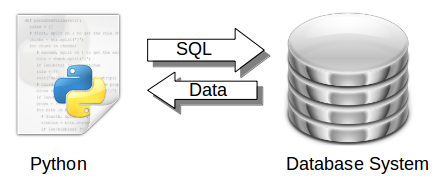
Data is retrieved from a database system using the SQL language.
Python has bindings for many database systems including MySQL, Postregsql, Oracle, Microsoft SQL Server and Maria DB.
One of these database management systems (DBMS) is called SQLite. SQLite was created in the year 2000 and is one of the many management systems in the database zoo.
SQL is a special-purpose programming language designed for managing data held in a databases. The language has been around since 1986 and is worth learning. The is an old funny video about SQL
SQLite

It is a self-contained, serverless, zero-configuration, transactional SQL database engine. The SQLite project is sponsored by Bloomberg and Mozilla.
Install SQLite:
Use this command to install SQLite:$ sudo apt-get install sqlite |
Verify if it is correctly installed. Copy this program and save it as test1.py
#!/usr/bin/python |
Execute with:
$ python test1.py |
It should output:
SQLite version: 3.8.2 |
What did the script above do?
The script connected to a new database called test.db with this line:
con = lite.connect('test.db') |
It then queries the database management system with the command
SELECT SQLITE_VERSION() |
which in turn returned its version number. That line is known as an SQL query.
Related course: Master SQL Databases with Python
SQL Create and Insert
The script below will store data into a new database called user.db
#!/usr/bin/python |
SQLite is a database management system that uses tables. These tables can have relations with other tables: it’s called relational database management system or RDBMS. The table defines the structure of the data and can hold the data. A database can hold many different tables. The table gets created using the command:
cur.execute("CREATE TABLE Users(Id INT, Name TEXT)") |
We add records into the table with these commands:
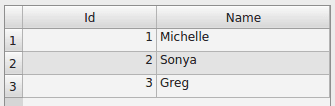
cur.execute("INSERT INTO Users VALUES(2,'Sonya')") |
The first value is the ID. The second value is the name. Once we run the script the data gets inserted into the database table Users:
SQLite query data
We can explore the database using two methods: the command line and a graphical interface.
From console: To explore using the command line type these commands:
sqlite3 user.db |
This will output the data in the table Users.
sqlite> SELECT * FROM Users; |
From GUI: If you want to use a GUI instead, there is a lot of choice. Personally I picked sqllite-man but there are many others. We install using:
sudo apt-get install sqliteman |
We start the application sqliteman. A gui pops up.
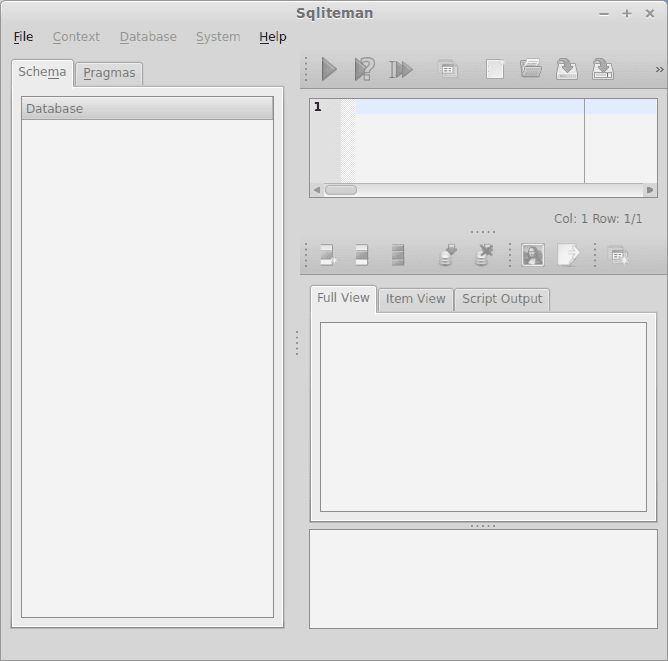
Press File > Open > user.db. It appears like not much has changed, do not worry, this is just the user interface. On the left is a small tree view, press Tables > users. The full table including all records will be showing now.
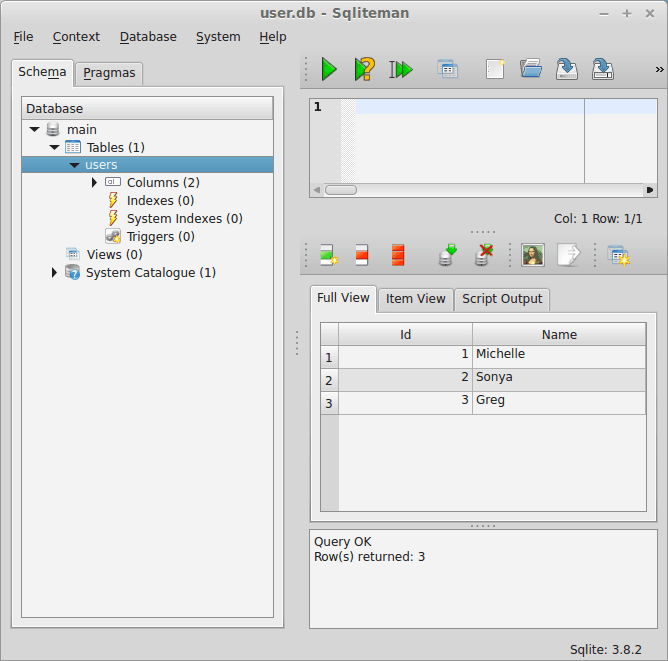
This GUI can be used to modify the records (data) in the table and to add new tables.
Related course: Master SQL Databases with PythonThe SQL database query language
SQL has many commands to interact with the database. You can try the commands below from the command line or from the GUI:
sqlite3 user.db |
We can use those queries in a Python program:
#!/usr/bin/python |
This will output all data in the Users table from the database:
$ python get.py |
Creating a user information database
We can structure our data across multiple tables. This keeps our data structured, fast and organized. If we would have a single table to store everything, we would quickly have a big chaotic mess. What we will do is create multiple tables and use them in a combination. We create two tables:
Users:

Jobs:

To create these tables, you can do that by hand in the GUI or use the script below:
# -*- coding: utf-8 -*- |
The jobs table has an extra parameter, Uid. We use that to connect the two tables in an SQL query:
SELECT users.name, jobs.profession FROM jobs INNER JOIN users ON users.ID = jobs.uid |
You can incorporate that SQL query in a Python script:
#!/usr/bin/python |
It should output:
$ python get2.py |
You may like: Databases and data analysis
Matplotlib Bar chart
Matplotlib may be used to create bar charts. You might like the Matplotlib gallery.
Matplotlib is a python library for visualizing data. You can use it to create bar charts in python. Installation of matplot is on pypi, so just use pip: pip install matplotlib
The course below is all about data visualization:
Related course:
Data Visualization with Matplotlib and Python
Bar chart code
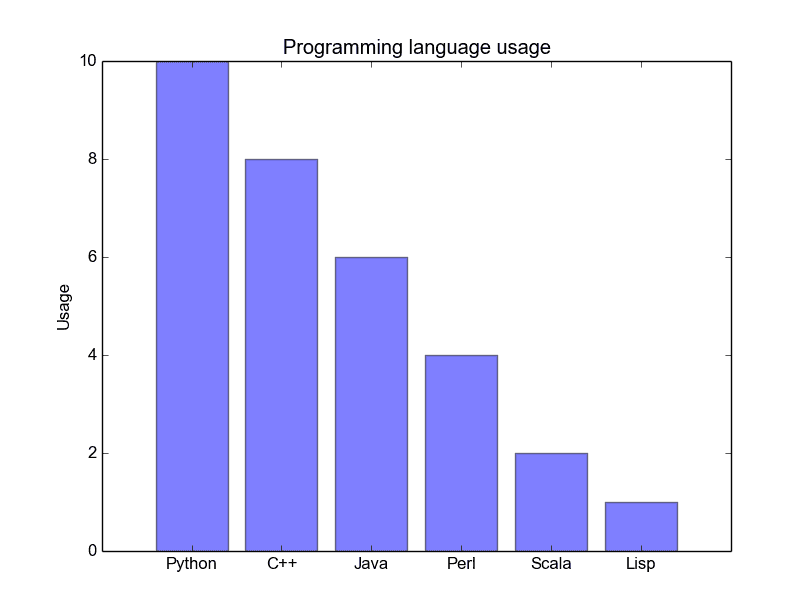
A bar chart shows values as vertical bars, where the position of each bar indicates the value it represents. matplot aims to make it as easy as possible to turn data into Bar Charts.
A bar chart in matplotlib made from python code. The code below creates a bar chart:
import matplotlib.pyplot as plt; plt.rcdefaults() |
Output:
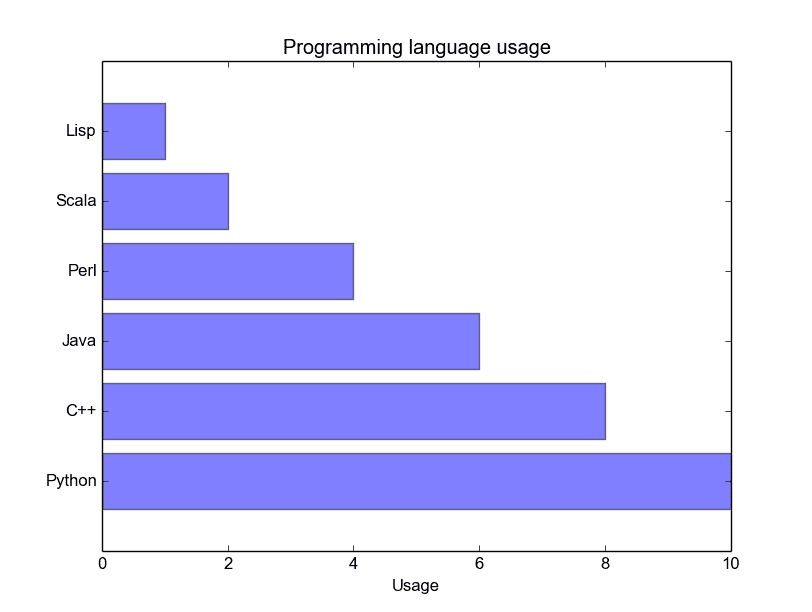
Matplotlib charts can be horizontal, to create a horizontal bar chart:
import matplotlib.pyplot as plt; plt.rcdefaults() |
Output:
Bar chart comparison
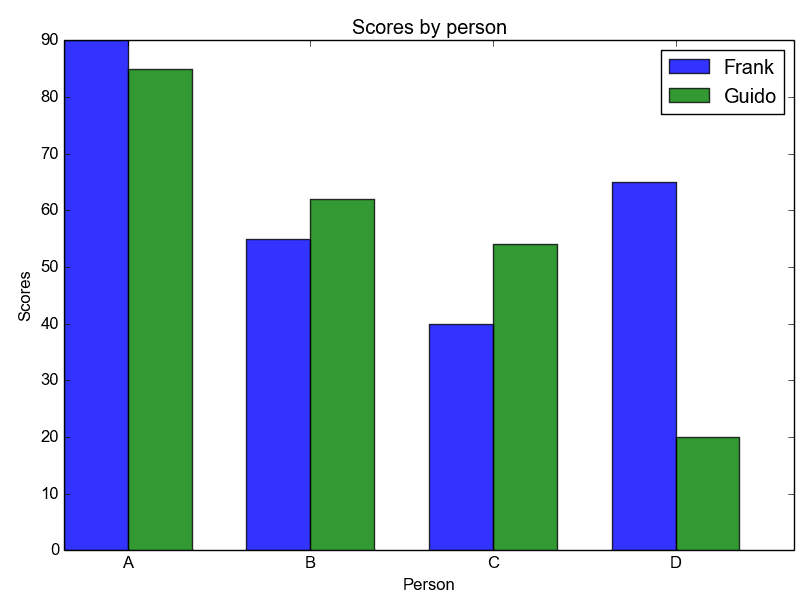
You can compare two data series using this Matplotlib code:
import numpy as np |
Output:
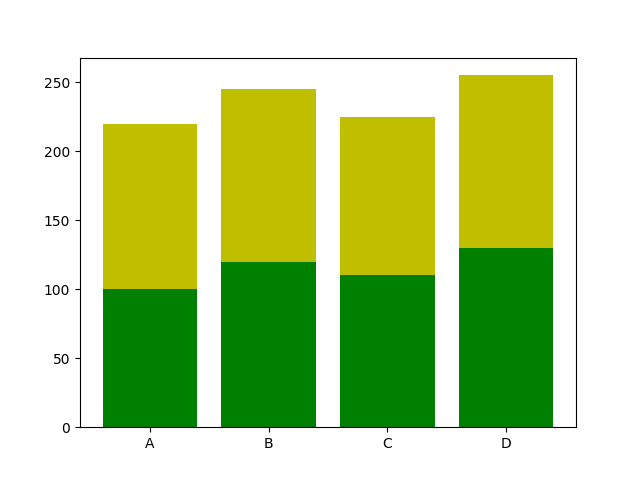
Stacked bar chart
The example below creates a stacked bar chart with Matplotlib. Stacked bar plots show diffrent groups together.
# load matplotlib |
Output:
Download All Matplotlib Examples
pie chart python
Matplotlib is a versatile library in Python that supports the creation of a wide variety of charts, including pie charts. Check out the Matplotlib gallery to explore more chart types.
Related course: Data Visualization with Matplotlib and Python
Crafting a Pie Chart with Matplotlib
To begin with, ensure you’ve imported the required module using: import matplotlib.pyplot as plt. Once done, the plt.pie() method is readily available for creating your pie chart.
Here’s a simple example that demonstrates how to generate a pie chart:
import matplotlib.pyplot as plt |
With the above code, the result is a visually pleasing pie chart.
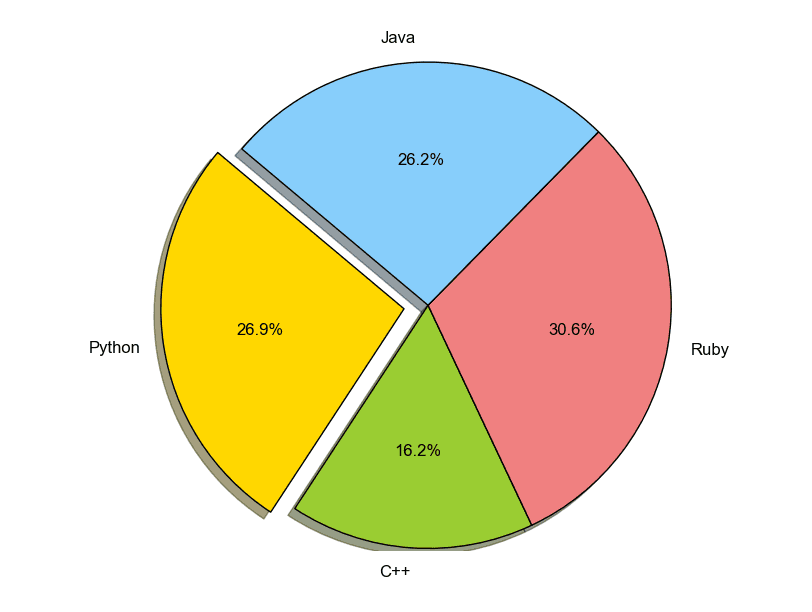
Matplotlib allows for extensive customization. You can determine slice sizes, which segments should stand out from the center (explode), their respective labels, and even their colors.
plt.pie(sizes, explode=explode, labels=labels, colors=colors, ...) |
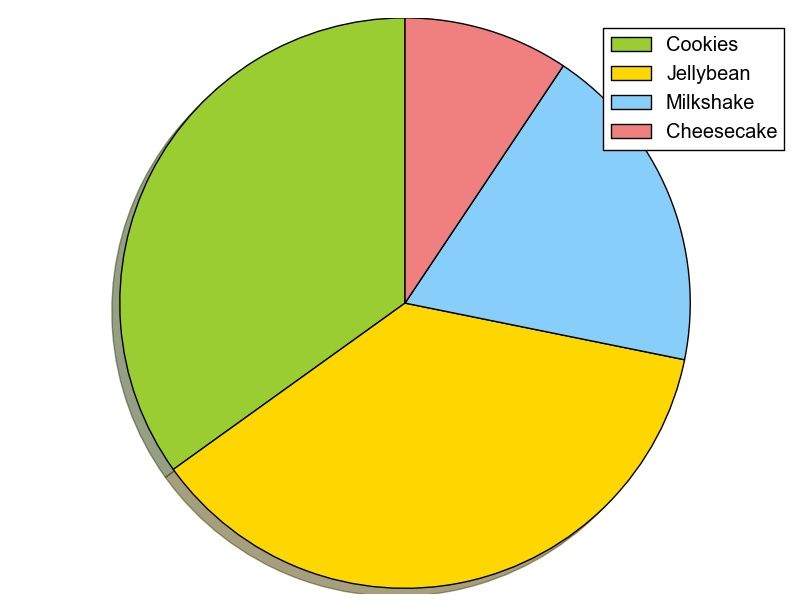
Enhancing Your Pie Chart with a Legend
To make your pie chart even more informative, consider adding a legend using the plt.legend() function. This overlays a legend on your chart, providing clarity.
import matplotlib.pyplot as plt |
This code renders a pie chart that’s enriched with a legend.
Always remember, after setting up your plot, call the method .show() to ensure it gets displayed.
plt.show() |
For more examples and downloadable code, click here.
Navigation: [
pyqt treeview
tkinter button
The Tkinter library in Python makes it easy to develop interactive desktop applications. One of its versatile features is the ability to display buttons, serving as an interactive interface component. Here, we will explore how to create and customize buttons using this powerful library.
⚙️ Installation Check
Before proceeding, ensure that you’re using the right version of Python. Check your version:
1 | python -- version |
📘 Related Course:
Crafting Simple Buttons
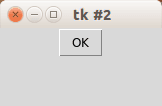
Let’s begin by creating a basic button that prints a message upon clicking:
1 | from Tkinter import * |
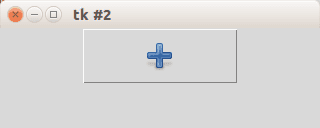
Crafting Image Buttons
Enhance your UI by using buttons with images. Here’s how:
1 | from Tkinter import * |
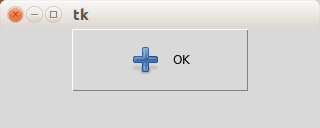
Adding Text Labels to Image Buttons
For a blend of imagery and text, adjust your button like this:
1 | from Tkinter import * |
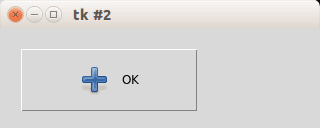
Positioning Buttons on Your GUI
Take control of your button’s position using the place function:
1 | from Tkinter import * |
Want More Insights?
Dive deeper with our downloadable Tkinter examples.
qt message box
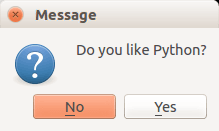
PyQT4 offers message box functionality using several functions.
Messageboxes included in PyQT4 are: question, warning, error, information, criticial and about box.
Related course: Create GUI Apps with Python PyQt5
PyQt4 mesagebox
The code below will display a message box with two buttons:#! /usr/bin/env python |
Result:
There are different types of messageboxes that PyQT4 provides.
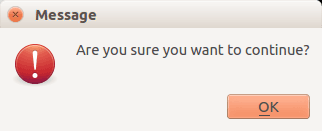
PyQT4 Warning Box
You can display a warning box using this line of code:
QMessageBox.warning(w, "Message", "Are you sure you want to continue?") |
PyQT4 Information box
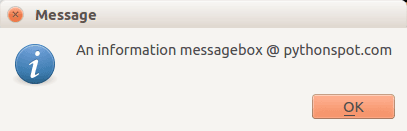
We can display an information box using QMessageBox.information()
QMessageBox.information(w, "Message", "An information messagebox @ pythonspot.com ") |
Result:
PyQT4 Critical Box
If something goes wrong in your application you may want to display an error message.
QMessageBox.critical(w, "Message", "No disk space left on device.") |
Result:
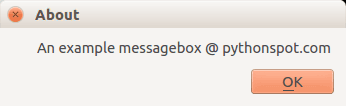
PyQT4 About box
We have shown the question box above.
QMessageBox.about(w, "About", "An example messagebox @ pythonspot.com ") |
Result:
Download PyQT Code (Bulk Collection)
python tuple
python dictionary
A dictionary can be thought of as an unordered set of key: value pairs.
A pair of braces creates an empty dictionary: {}. Each element can maps to a certain value. An integer or string can be used for the index. Dictonaries do not have an order.
Related Course:
Python Programming Bootcamp: Go from zero to hero
Dictionary example
Let us make a simple dictionary:
#!/usr/bin/python |
Output:
|
We are by no means limited to single word defintions in the value part. A demonstration:
#!/usr/bin/python |
Output:
|
Manipulating the dictionary
We can manipulate the data stored in a dictionairy after declaration. This is shown in the example below:
#!/usr/bin/python |
Output:
|
If you are new to Python programming, I highly recommend this book.
How to Read a File in Python
encapsulation in python
python class inheritance
Polymorphism
python factory
recursion in python
Recursion is a widely-discussed concept not just in programming, but also in day-to-day language. An example from the English language that beautifully captures recursion is “To understand recursion, you must first understand recursion”. Similarly, the saying “A human is someone whose mother is human” offers another simple explanation.
Now, pivoting to programming, you may ask: How is this relevant?
In the realm of problem-solving, often there’s a need to break down a large, intricate problem into smaller, manageable parts. While you might be accustomed to using loops or iterations for such purposes, sometimes, recursion provides a more elegant and intuitive solution.
So, what exactly is recursion in Python? A function is termed as recursive when it makes a call to itself, but it’s imperative that this function has a stopping point or a termination condition. This ensures that the function doesn’t end up calling itself endlessly.
Related Course: Python Programming Bootcamp: Go from zero to hero
Recursion in Practice
List-Based Recursion Example
Consider a simple task of summing all numbers in a given list. A non-recursive approach to achieve this would be:
#!/usr/bin/env python |
The above approach is straightforward: we iterate through each element and accumulate the sum. But how can we approach this using recursion?
#!/usr/bin/env python |
Here, if the list contains just one element, that element is returned (acting as the termination condition). Otherwise, the function adds the first element to the sum of the rest of the list (achieved through a recursive call).
Factorial Using Recursion
Factorials are often calculated using recursion in programming. The mathematical definition states: n! = n * (n-1)!, given n > 1 and f(1) = 1. For instance, 3! = 3 x 2 x 1 = 6. Here’s how you can compute factorials recursively in Python:
#!/usr/bin/env python |
In the above code, as long as the input is greater than 1, the function keeps calling itself, thus calculating the factorial in a recursive manner.
Constraints of Using Recursion
It’s essential to understand the limitations of recursion. Each time a function calls itself, it uses some memory to store return values. Because of this, a recursive function can sometimes use a lot more memory compared to its iterative counterpart. In Python, recursion is limited to a depth of 1000 calls. If you try to surpass this, as demonstrated below:
#!/usr/bin/env python |
You’ll be met with the error:
RuntimeError: maximum recursion depth exceeded |
Some languages might crash your program under such conditions. While you can tweak the maximum recursion depth in Python, as shown:
#!/usr/bin/env python |
Remember that this isn’t a foolproof solution. There will always be a threshold, and for problems like calculating large factorials, a recursive function might not be the most efficient choice. However, for tasks like directory traversal, recursion can be quite handy.
Related Course: Python Programming Bootcamp: Go from zero to hero
python logging
Python logging
We can track events in a software application, this is known as logging. Let’s start with a simple example, we will log a warning message.
As opposed to just printing the errors, logging can be configured to disable output or save to a file. This is a big advantage to simple printing the errors.
Related course
Python Programming Bootcamp: Go from zero to hero
Logging example
import logging |
This will output:
WARNING:root:This is a warning! |
We can easily output to a file:
import logging |
The importance of a log message depends on the severity.
Level of severity
The logger module has several levels of severity. We set the level of severity using this line of code:
logging.basicConfig(level=logging.DEBUG) |
These are the levels of severity:
| Type | Description |
|---|---|
| DEBUG | Information only for problem diagnostics |
| INFO | The program is running as expected |
| WARNING | Indicate something went wrong |
| ERROR | The software will no longer be able to function |
| CRITICAL | Very serious error |
import logging |
Time in log
You can enable time for logging using this line of code:
logging.basicConfig(format='%(asctime)s %(message)s') |
An example below:
import logging |
Output:
2015-06-25 23:24:01,153 Logging app started |
Related course
Python Programming Bootcamp: Go from zero to hero
python subprocess
python threading
python create set
Sets in Python
A set in Python is a collection of objects. Sets are available in Python 2.4 and newer versions. They are different from lists or tuples in that they are modeled after sets in mathematics.
Related course
Python Programming Bootcamp: Go from zero to hero
Set example
To create a set, we use the set() function.
#!/usr/bin/env python |
If we add the same item element multiple times, they are removed. A set may not contain the same element multiple times.
#!/usr/bin/env python |
Simple notation
If you use Python version 2.6 or a later version, you can use a simplified notation:
#!/usr/bin/env python |
Set Methods
Clear elements from set
To remove all elements from sets:
#!/usr/bin/env python |
Add elements to a set
To add elements to a set:
#!/usr/bin/env python |
Remove elements to a set
To remove elements to a set:
!/usr/bin/env python |
Difference between two sets
To find the difference between two sets use:
#!/usr/bin/env python |
Be aware that x.difference(y) is different from y.difference(x).
Subset
To test if a set is a subset use:
#!/usr/bin/env python |
Super-set
To test if a set is a super-set:
#!/usr/bin/env python |
Intersection
To test for intersection, use:
#!/usr/bin/env python |
Related course
Python Programming Bootcamp: Go from zero to hero
qpython
python web development
django getting started
python state machine
python binary number
flask hello world
In this tutorial you’ll learn how to build a web app with Python.
We’ll use a micro-framework called Flask. It has a small core but is extensible with many plugins such as SQLAlchemy, Babel, CouchDB, MongoDB etc.
Some Flask example apps are:
- flaskr — a microblog
- minitwit — a twitter clone
- flask website — static pages + mailinglist archives
Related course
Python Flask: Make Web Apps with Python
- easy to use.
- built in development server and debugger
- integrated unit testing support
- RESTful request dispatching
- uses Jinja2 templating
- support for secure cookies (client side sessions)
- 100% WSGI 1.0 compliant
- Unicode based
- extensively documented
Installing Flask
Install Flask using the command below:
pip install Flask |
Flask hello world app
Create a file called hello.py
|
Finally run the web app using this command:
$ python hello.py |
Open http://localhost:5000/ in your webbrowser, and “Hello World!” should appear.
jinja2 tutorial
chart flask
flask
python mysql
python download file from url
wx.filedialog
python dialog box input
python text game
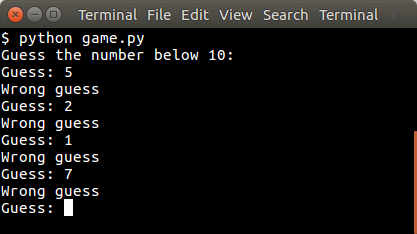
In this article we will demonstrate how to create a simple guessing game.
The goal of the game is to guess the right number.
Example
An example run below:
You may like
Simple games with Python
Random number
The user will be asked to guess the random number. We first pick the random number:
from random import randint |
The randint() function will pick a pseudo random number between 1 and 10. Then we have to continue until the correct number is found:
guess = -1 |
Python Guessing Game
The code below starts the game:
from random import randint |
An example run:
Guess the number below 10: |
You may like
Simple games with Python
python socket
python json
pyqt menu
pyqt widgets
QT4 Table
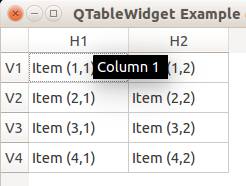
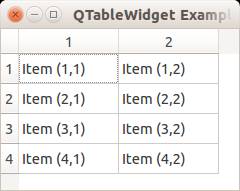
We can show a table using the QTableWidget, part of the PyQt module. We set the title, row count, column count and add the data.
Related course:
Qt4 Table example
An example below:
from PyQt4.QtGui import * |
Result:
QTableWidget labels
You can set the header using the setHorizontalHeaderLabels() function. The same applies for vertical labels. A qt4 demonstration below:
from PyQt4.QtGui import * |
Result:
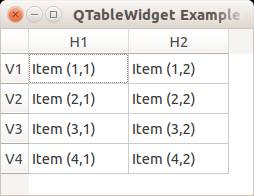
Note: These days you can use pyqt5 to create a pyqt table.
QTableWidget click events
We can detect cell clicks using this procedure, first add a function:
# on click function |
Then define the function:
def cellClick(row,col): |
The Python programming language starts counting with 0, so when you press on (1,1) you will see (0,0). Full code to detect table clicks:
from PyQt4.QtGui import * |
If you want to show the cell/row numbers in a non-programmer way use this instead:
def cellClick(row,col): |
Tooltip text
We can set tooltip (mouse over) text using the method. If you set tooltips on non-existing columns you will get an error.
from PyQt4.QtGui import * |
Result: