Category: pro
Python hosting: Host, run, and code Python in the cloud!
wxPython Buttons
To create a button simply call wx.Button(). When creating a button with wx.Button() it is important to parse the panel as first argument. We attach it to a panel because attaching to the frame would make it full screen.
A panel gives you to option to position widgets anywhere in the window. The parameter (10,10) is the position on the panel. The id argument is necessary, but it is equal to -1 (wx.ID_ANY == -1). The 3rd parameter is the text on the button.
You can use the code below to create a button in wxPython:
#!/usr/bin/python import wx def onButton(event): print "Button pressed." app = wx.App() frame = wx.Frame(None, -1, 'win.py') frame.SetDimensions(0,0,200,50) panel = wx.Panel(frame, wx.ID_ANY) button = wx.Button(panel, wx.ID_ANY, 'Test', (10, 10)) button.Bind(wx.EVT_BUTTON, onButton) frame.Show() frame.Centre() app.MainLoop() |
The function onButton() is called if the button is pressed. We bind (connect) it with button.Bind(wx.EVT_BUTTON, onButton).
Output:
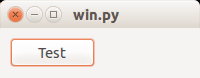
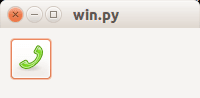
Image on button
wxPython supports having images on buttons. Only a minor change is needed to display an image on a button. While the function is called wx.BitmapButton, it supports other image formats.
bmp = wx.Bitmap("call-start.png", wx.BITMAP_TYPE_ANY) button = wx.BitmapButton(panel, id=wx.ID_ANY, bitmap=bmp, size=(bmp.GetWidth()+10, bmp.GetHeight()+10)) |
The first line loads the image, the second line creates the button.
Full code:
#!/usr/bin/python import wx def onButton(event): print "Button pressed." app = wx.App() frame = wx.Frame(None, -1, 'win.py') frame.SetDimensions(0,0,200,70) panel = wx.Panel(frame, wx.ID_ANY) bmp = wx.Bitmap("call-start.png", wx.BITMAP_TYPE_ANY) button = wx.BitmapButton(panel, id=wx.ID_ANY, bitmap=bmp, size=(bmp.GetWidth()+10, bmp.GetHeight()+10)) button.Bind(wx.EVT_BUTTON, onButton) button.SetPosition((10,10)) frame.Show() frame.Centre() app.MainLoop() |
Output:
wxPython dialogs
To display a dialog with wxPython requires only a few lines of code. We will demonstrate that below:
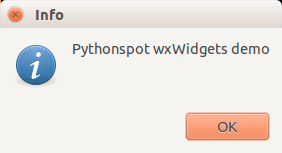
Information dialog
An information dialog can be shown with one line of code:
import wx app = wx.App() wx.MessageBox('Pythonspot wxWidgets demo', 'Info', wx.OK | wx.ICON_INFORMATION) |
The first parameter is the actual text to display. The second is the title and final parameter tells wx to show the information icon and button.
Output:
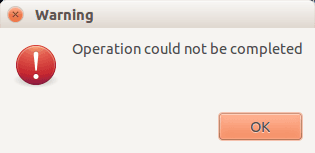
More dialogs: Warning dialog, Error dialog and default dialog
By modifying the parameters you can easily create other types of dailogs. An example below:
import wx app = wx.App() # simple dialog wx.MessageBox('A dialog', 'Title', wx.OK) # warning dialog wx.MessageBox('Operation could not be completed', 'Warning', wx.OK | wx.ICON_WARNING) # error dialog wx.MessageBox('Operation could not be completed', 'Error', wx.OK | wx.ICON_ERROR) |
Output (only one of the dialogs):
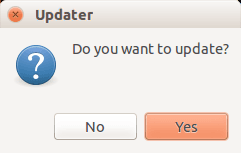
Question dialog
Wx can be used to create a question dialog (yes/no). Example code:
import wx app = wx.App() dlg = wx.MessageDialog(None, "Do you want to update?",'Updater',wx.YES_NO | wx.ICON_QUESTION) result = dlg.ShowModal() if result == wx.ID_YES: print "Yes pressed" else: print "No pressed" |
Output:
wxPython file dialog
Nearly every desktop application that can open one or more files has a file dialog.
An open file dialog may seem like a very complicated window to create: it contains buttons, locations, labels and many more widgets. Moreover, the appearance of this open file dialog looks different on every platform: Mac OS, Windows and so on.
The wxPython module comes with open file dialogs, which can be created with a few functions calls.

wxPython file dialog
The example below creates a file dialog with a native appearance using wxPython:
#!/usr/bin/python import wx def onButton(event): print "Button pressed." app = wx.App() frame = wx.Frame(None, -1, 'win.py') frame.SetDimensions(0,0,200,50) # Create open file dialog openFileDialog = wx.FileDialog(frame, "Open", "", "", "Python files (*.py)|*.py", wx.FD_OPEN | wx.FD_FILE_MUST_EXIST) openFileDialog.ShowModal() print(openFileDialog.GetPath()) openFileDialog.Destroy() |
To create a file dialog with wxPython we can simply call wx.FileDialog().
The definition of this method is: (parent, message, defaultDir, defaultFile, wildcard, style, pos)
We call this method with the arguments:
wx.FileDialog(frame, "Open", "", "","Python files (*.py)|*.py",wx.FD_OPEN | wx.FD_FILE_MUST_EXIST) |
(no default dir or default file is specified).
The method showModal() displays the window:
openFileDialog.ShowModal() |
The command openFileDialog.GetPath() returns the full path to the file if one is selected.
wxPython input dialog
Input dialogs let your user give you feedback or input. They appear in desktop applications once in a while.
wxPython supports input dialogs, they are included with the framework.
A typical wxPython dialog may look like:
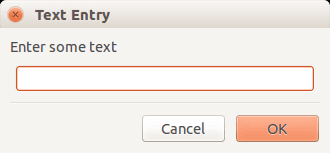
wxPython input dialog
The example code below creates an input dialog with wxPython:
#!/usr/bin/python import wx def onButton(event): print "Button pressed." app = wx.App() frame = wx.Frame(None, -1, 'win.py') frame.SetDimensions(0,0,200,50) # Create text input dlg = wx.TextEntryDialog(frame, 'Enter some text','Text Entry') dlg.SetValue("Default") if dlg.ShowModal() == wx.ID_OK: print('You entered: %s\n' % dlg.GetValue()) dlg.Destroy() |
A wxPython textbox can be added to a window using the function:
wx.TextEntryDialog(frame, 'Enter some text','Text Entry') |
Where the first argument is the frame, the second argument is the label and the last argument is the window title.
The function below displays the dialog and waits for a user to press one of the buttons:
dlg.ShowModal() |
You can get the button pressed by picking one of these:
wx.OK wx.CANCEL |
(the result is either one of these)
After input is been given, you can get the input text using dlg.GetValue() function.
wxPython menu
Most desktop applications have a window menu. They may look different depending the operating system.
wxPython will make every desktop application look like a native app. If you want the same appearance on every platform consider using another GUI framework.
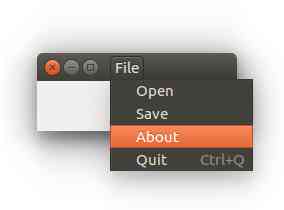
wxPython menu
The code below will create a menubar in your wxPython window:
#!/usr/bin/python import wx app = wx.App() frame = wx.Frame(None, -1, 'win.py') frame.SetDimensions(0,0,200,50) # Setting up the menu. filemenu= wx.Menu() filemenu.Append(101, "Open", "Open") filemenu.Append(102, "Save", "Save") filemenu.Append(wx.ID_ABOUT, "About","About") filemenu.Append(wx.ID_EXIT,"Exit","Close") # Creating the menubar. menuBar = wx.MenuBar() menuBar.Append(filemenu,"File") # Adding the "filemenu" to the MenuBar frame.SetMenuBar(menuBar) # Adding the MenuBar to the Frame content. frame.Show() app.MainLoop() |
A menu in wxPython is simple a wx.MenuBar().
This menu alone will not do anything, it needs to have several sub-menus such as a File menu. A sub-menu can be created with wx.Menu() which in turn has several items.
Finally, we set the frame’s menubar to the menubar we created.
wxPython has some default ids such as wx.ID_ABOUT and wx.ID_EXIT, which are both just integers. You can define your own ids as we did (101, 102).
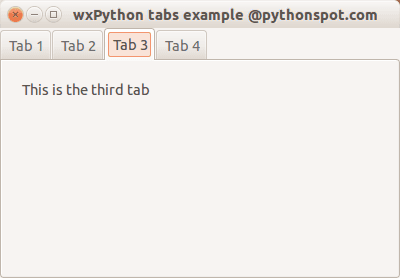
wxPython tabs
While we did not heavily use object orientation for the wxPython series yet for simplicity reasons, we cannot go around it. In this tutorial you will learn how to create a tab interface with wxPython.
The class Mainframe creates the frame as we did in the previous examples. The other classes are the contents of the tabs. We create a panel and notebook (tab holder) in the main frame. Then we create tab objects :
tab1 = TabOne(nb) tab2 = TabTwo(nb) ... |
which we attach to the tab holder using:
nb.AddPage(tab1, "Tab 1") nb.AddPage(tab2, "Tab 2") ... |
Full code:
import wx # Define the tab content as classes: class TabOne(wx.Panel): def __init__(self, parent): wx.Panel.__init__(self, parent) t = wx.StaticText(self, -1, "This is the first tab", (20,20)) class TabTwo(wx.Panel): def __init__(self, parent): wx.Panel.__init__(self, parent) t = wx.StaticText(self, -1, "This is the second tab", (20,20)) class TabThree(wx.Panel): def __init__(self, parent): wx.Panel.__init__(self, parent) t = wx.StaticText(self, -1, "This is the third tab", (20,20)) class TabFour(wx.Panel): def __init__(self, parent): wx.Panel.__init__(self, parent) t = wx.StaticText(self, -1, "This is the last tab", (20,20)) class MainFrame(wx.Frame): def __init__(self): wx.Frame.__init__(self, None, title="wxPython tabs example @pythonspot.com") # Create a panel and notebook (tabs holder) p = wx.Panel(self) nb = wx.Notebook(p) # Create the tab windows tab1 = TabOne(nb) tab2 = TabTwo(nb) tab3 = TabThree(nb) tab4 = TabFour(nb) # Add the windows to tabs and name them. nb.AddPage(tab1, "Tab 1") nb.AddPage(tab2, "Tab 2") nb.AddPage(tab3, "Tab 3") nb.AddPage(tab4, "Tab 4") # Set noteboook in a sizer to create the layout sizer = wx.BoxSizer() sizer.Add(nb, 1, wx.EXPAND) p.SetSizer(sizer) if __name__ == "__main__": app = wx.App() MainFrame().Show() app.MainLoop() |
Output: