
Category: pro
Python hosting: Host, run, and code Python in the cloud!
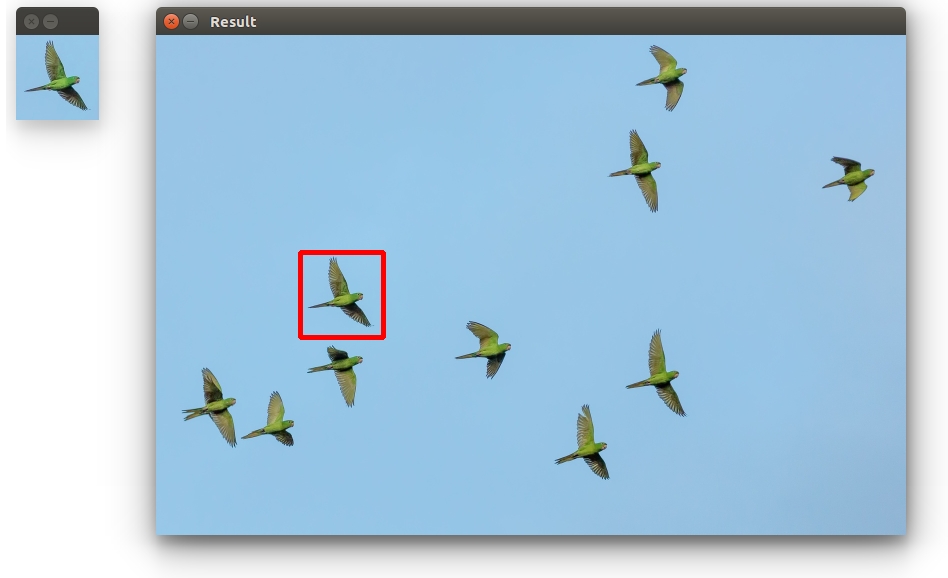
Object detection with templates
Template matching is a technique for finding areas of an image that are similar to a patch (template).
Its application may be robotics or manufacturing.
Introduction
A patch is a small image with certain features. The goal of template matching is to find the patch/template in an image.
To find them we need both:
- Source Image (S) : The space to find the matches in
- Template Image (T) : The template image
The template image T is slided over the source image S (moved over the source image), and the program tries to find matches using statistics.
Template matching example
Lets have a look at the code:
import numpy as np import cv2 image = cv2.imread('photo.jpg') template = cv2.imread('template.jpg') # resize images image = cv2.resize(image, (0,0), fx=0.5, fy=0.5) template = cv2.resize(template, (0,0), fx=0.5, fy=0.5) # Convert to grayscale imageGray = cv2.cvtColor(image, cv2.COLOR_BGR2GRAY) templateGray = cv2.cvtColor(template, cv2.COLOR_BGR2GRAY) # Find template result = cv2.matchTemplate(imageGray,templateGray, cv2.TM_CCOEFF) min_val, max_val, min_loc, max_loc = cv2.minMaxLoc(result) top_left = max_loc h,w = templateGray.shape bottom_right = (top_left[0] + w, top_left[1] + h) cv2.rectangle(image,top_left, bottom_right,(0,0,255),4) # Show result cv2.imshow("Template", template) cv2.imshow("Result", image) cv2.moveWindow("Template", 10, 50); cv2.moveWindow("Result", 150, 50); cv2.waitKey(0) |
Explanation
First we load both the source image and template image with imread(). We resize themand convert them to grayscale for faster detection:
image = cv2.imread('photo.jpg') template = cv2.imread('template.jpg') image = cv2.resize(image, (0,0), fx=0.5, fy=0.5) template = cv2.resize(template, (0,0), fx=0.5, fy=0.5) imageGray = cv2.cvtColor(image, cv2.COLOR_BGR2GRAY) templateGray = cv2.cvtColor(template, cv2.COLOR_BGR2GRAY) |
We use the cv2.matchTemplate(image,template,method) method to find the most similar area in the image. The third argument is the statistical method.
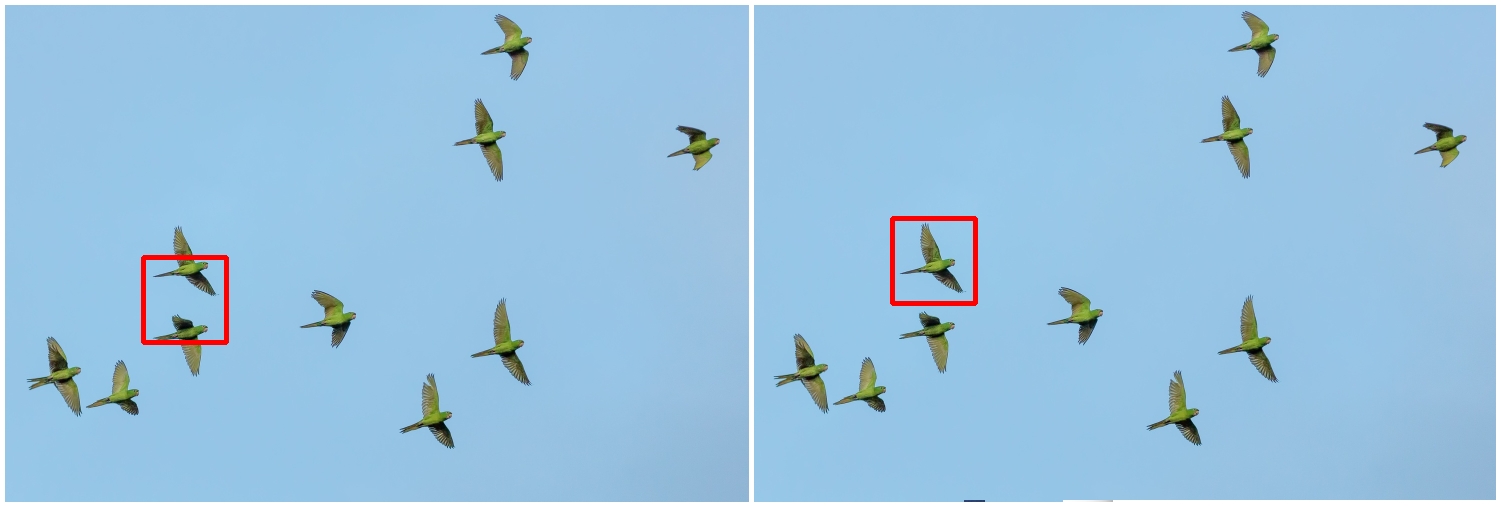
This method has six matching methods: CV_TM_SQDIFF, CV_TM_SQDIFF_NORMED, CV_TM_CCORR, CV_TM_CCORR_NORMED, CV_TM_CCOEFF and CV_TM_CCOEFF_NORMED.
which are simply different statistical comparison methods
Finally, we get the rectangle variables and display the image.
Limitations
Template matching is not scale invariant nor is it rotation invariant. It is a very basic and straightforward method where we find the most correlating area. Thus, this method of object detection depends on the kind of application you want to build. For non scale and rotation changing input, this method works great.
You may like: Robotics or Car tracking with cascades.
Tk menubar
The Tkinter toolkit comes with all the basic widgets to create graphical applications. Almost every app has a main menu. As expected, Tkinter supports adding a main menu to your application window.
The screenshot below demonstrates a Tkinter based menu:

Related course
Tkinter menubar
You can create a simle menu with Tkinter using the code below. Every option (new, open, save.. ) should have its own callback.
from Tkinter import * def donothing(): x = 0 root = Tk() menubar = Menu(root) filemenu = Menu(menubar, tearoff=0) filemenu.add_command(label="New", command=donothing) filemenu.add_command(label="Open", command=donothing) filemenu.add_command(label="Save", command=donothing) filemenu.add_separator() filemenu.add_command(label="Exit", command=root.quit) menubar.add_cascade(label="File", menu=filemenu) helpmenu = Menu(menubar, tearoff=0) helpmenu.add_command(label="Help Index", command=donothing) helpmenu.add_command(label="About...", command=donothing) menubar.add_cascade(label="Help", menu=helpmenu) root.config(menu=menubar) root.mainloop() |
We create the menubar with the call:
menubar = Menu(root) |
where root is a Tk() object.
A menubar may contain zero or more submenus such as the file menu, edit menu, view menu, tools menu etcetera.
A submenu can be created using the same Menu() call, where the first argument is the menubar to attach to.
filemenu = Menu(menubar, tearoff=0) menu = Menu(menubar, tearoff=0) |
Individual options can be added to these submenus using the add_command() method:
filemenu.add_command(label="New", command=donothing) filemenu.add_command(label="Open", command=donothing) filemenu.add_command(label="Save", command=donothing) |
In the example we created the callback function donothing() and linked every command to it for simplicity. An option is added using the add_comment() function. We call add_cascade() to add this menu list to the specific list.
Tk widgets
Tkinter has several widgets including:
- Label
- EditText
- Images
- Buttons (Discussed before)
In this article we will show how to use some of these Tkinter widgets. Keep in mind there’s a slight difference between Tkinter for Python 2.x and 3.x
Related course
Label
To create a label we simply call the Label() class and pack it. The numbers padx and pady are the horizontal and vertical padding.
from Tkinter import * root = Tk() root.title('Python Tk Examples @ pythonspot.com') Label(root, text='Python').pack(pady=20,padx=50) root.mainloop() |
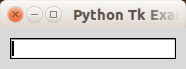
EditText (Entry widget)
To get user input you can use an Entry widget.
from Tkinter import * root = Tk() root.title('Python Tk Examples @ pythonspot.com') var = StringVar() textbox = Entry(root, textvariable=var) textbox.focus_set() textbox.pack(pady=10, padx=10) root.mainloop() |
Result:
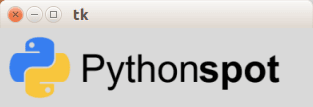
Images
Tk has a widget to display an image, the PhotoImage. It is quite easy to load an image:
from Tkinter import * import os root = Tk() img = PhotoImage(file="logo2.png") panel = Label(root, image = img) panel.pack(side = "bottom", fill = "both", expand = "yes") root.mainloop() |
Result:
GUI editor
An overview of Tkinter GUI editors can be found here: http://wiki.tcl.tk/4056
Tkinter tkFileDialog module
tkFileDialog is a module with open and save dialog functions.
Instead of implementing those in Tkinter GUI on your own.
Related courses
Overview
An overview of file dialogs:
| Function | Parameters | Purpose |
|---|---|---|
| .askopenfilename | Directory, Title, Extension | To open file: Dialog that requests selection of an existing file. |
| .asksaveasfilename | Directory, Title, Extension) | To save file: Dialog that requests creation or replacement of a file. |
| .askdirectory | None | To open directory |
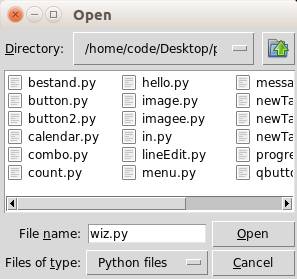
Tkinter Open File
The askopenfilename function to creates an file dialog object. The extensions are shown in the bottom of the form (Files of type). The code below will simply show the dialog and return the filename. If a user presses cancel the filename is empty. On a Windows machine change the initialdir to “C:\”.
Python 2.7 version:
from Tkinter import *from Tkinter import * import Tkinter, Tkconstants, tkFileDialog root = Tk() root.filename = tkFileDialog.askopenfilename(initialdir = "/",title = "Select file",filetypes = (("jpeg files","*.jpg"),("all files","*.*"))) print (root.filename) |
Python 3 version:
from tkinter import filedialog from tkinter import * root = Tk() root.filename = filedialog.askopenfilename(initialdir = "/",title = "Select file",filetypes = (("jpeg files","*.jpg"),("all files","*.*"))) print (root.filename) |
Here is an example (on Linux):
Tkinter Save File
The asksaveasfilename function prompts the user with a save file dialog.
Python 2.7 version
from Tkinter import * import Tkinter, Tkconstants, tkFileDialog root = Tk() root.filename = tkFileDialog.asksaveasfilename(initialdir = "/",title = "Select file",filetypes = (("jpeg files","*.jpg"),("all files","*.*"))) print (root.filename) |
Python 3 version
from tkinter import filedialog from tkinter import * root = Tk() root.filename = filedialog.asksaveasfilename(initialdir = "/",title = "Select file",filetypes = (("jpeg files","*.jpg"),("all files","*.*"))) print (root.filename) |
Tkinter Open Directory
The askdirectory presents the user with a popup for directory selection.
Python 2.7 version
from Tkinter import * import Tkinter, Tkconstants, tkFileDialog root = Tk() root.directory = tkFileDialog.askdirectory() print (root.directory) |

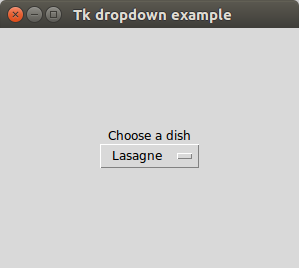
Tk dropdown example
Tkinter supports dropdown menus. This is similar to your standard combobox on your operating system.
The widget is called OptionMenu and the parameters you need are: frame, tk variable and a dictionary with choices.
Related course:
Tkinter dropdown example
The example below creates a Tkinter window with a combobox.
from Tkinter import * import Tkinter as ttk from ttk import * root = Tk() root.title("Tk dropdown example") # Add a grid mainframe = Frame(root) mainframe.grid(column=0,row=0, sticky=(N,W,E,S) ) mainframe.columnconfigure(0, weight = 1) mainframe.rowconfigure(0, weight = 1) mainframe.pack(pady = 100, padx = 100) # Create a Tkinter variable tkvar = StringVar(root) # Dictionary with options choices = { 'Pizza','Lasagne','Fries','Fish','Potatoe'} tkvar.set('Pizza') # set the default option popupMenu = OptionMenu(mainframe, tkvar, *choices) Label(mainframe, text="Choose a dish").grid(row = 1, column = 1) popupMenu.grid(row = 2, column =1) # on change dropdown value def change_dropdown(*args): print( tkvar.get() ) # link function to change dropdown tkvar.trace('w', change_dropdown) root.mainloop() |
It starts by creating a Tk object and pass it to a tkinter frame created with Frame()
root = Tk() root.title("Tk dropdown example") mainframe = Frame(root) |
A grid is added to the frame which will hold the combo-box.
mainframe.grid(column=0,row=0, sticky=(N,W,E,S) ) mainframe.columnconfigure(0, weight = 1) mainframe.rowconfigure(0, weight = 1) mainframe.pack(pady = 100, padx = 100) |
The popup menu contains a list of options which is defined in the variable choices.
A Tkinter variable is created with the line:
tkvar = StringVar(root) |
The default value of the variable is set with the .set() method.
We create the Tkinter combobox with:
popupMenu = OptionMenu(mainframe, tkvar, *choices) |
And link the callback method change_dropdown to this combobox.