
Category: qt4
pyqt text box

In this article you will learn how to interact with a textbox using PyQt4.
If you want to display text in a textbox (QLineEdit) you could use the setText() method.
Related course:
PyQt4 QLineEdit
The textbox example below changes the text if the button is pressed. Besides text, PyQt can show many more things like images with a qwidget or buttons with qpushbutton.
|
The text field is created with the lines:
|
The button (from screenshot) is made with:
|
We connect the button to the on_click function by:
|
This function sets the textbox using setText().
Download PyQT Code (Bulk Collection)
qpushbutton signals

PyQt4 (Qt4) supports buttons through the QPushButton widget.
We extend the code to display a button in the center of the window.
The button will show a tooltip if hovered and when pressed will close the program.
Related course:
PyQt4 button example
The example below adds a button to a PyQt4 window.
|
PyQt4 signals and slots
A button click should do something. To do so, you must use signals and slots.
If a user does an action such as clicking on a button, typing text in a box – the widget sends out a signal. Signals can be connected with a slot, that acts as a receiver and acts on it.
Note that these days, PyQt5 can be used to create a qpushbutton. Then use signals and slots to make it interactive.
|
Download PyQT Code (Bulk Collection)
Qt4 window
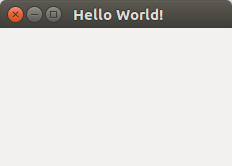
In this tutorial you will learn how to create a graphical hello world application with PyQT4.
PyQT4, it is one of Pythons options for graphical user interface (GUI) programming.
Related course:
PyQt4 window example:
This application will create a graphical window that can be minimized, maximimzed and resized it.
|
The PyQT4 module must be immported, we do that with this line:
|
We create the PyQT4 application object using QApplication():
|
We create the window (QWidget), resize, set the tittle and show it with this code:
|
Don’t forget to show the window:
|
You can download a collection of PyQt4 examples:
Download PyQT Code (Bulk Collection)
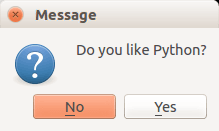
qt message box
PyQT4 offers message box functionality using several functions.
Messageboxes included in PyQT4 are: question, warning, error, information, criticial and about box.
Related course: Create GUI Apps with Python PyQt5
PyQt4 mesagebox
The code below will display a message box with two buttons:#! /usr/bin/env python |
Result:
There are different types of messageboxes that PyQT4 provides.
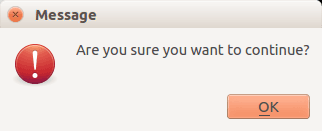
PyQT4 Warning Box
You can display a warning box using this line of code:
QMessageBox.warning(w, "Message", "Are you sure you want to continue?") |
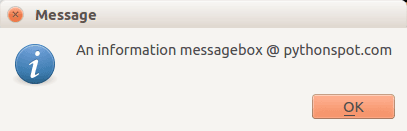
PyQT4 Information box
We can display an information box using QMessageBox.information()
QMessageBox.information(w, "Message", "An information messagebox @ pythonspot.com ") |
Result:
PyQT4 Critical Box
If something goes wrong in your application you may want to display an error message.
QMessageBox.critical(w, "Message", "No disk space left on device.") |
Result:
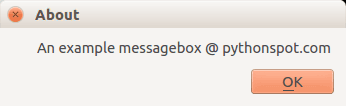
PyQT4 About box
We have shown the question box above.
QMessageBox.about(w, "About", "An example messagebox @ pythonspot.com ") |
Result:
Download PyQT Code (Bulk Collection)
pyqt menu
pyqt widgets
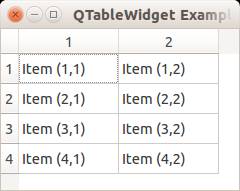
QT4 Table
We can show a table using the QTableWidget, part of the PyQt module. We set the title, row count, column count and add the data.
Related course:
Qt4 Table example
An example below:
from PyQt4.QtGui import * |
Result:
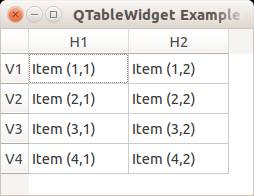
QTableWidget labels
You can set the header using the setHorizontalHeaderLabels() function. The same applies for vertical labels. A qt4 demonstration below:
from PyQt4.QtGui import * |
Result:
Note: These days you can use pyqt5 to create a pyqt table.
QTableWidget click events
We can detect cell clicks using this procedure, first add a function:
# on click function |
Then define the function:
def cellClick(row,col): |
The Python programming language starts counting with 0, so when you press on (1,1) you will see (0,0). Full code to detect table clicks:
from PyQt4.QtGui import * |
If you want to show the cell/row numbers in a non-programmer way use this instead:
def cellClick(row,col): |
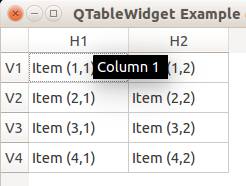
Tooltip text
We can set tooltip (mouse over) text using the method. If you set tooltips on non-existing columns you will get an error.
from PyQt4.QtGui import * |
Result:
Download PyQT Code (Bulk Collection)
pyqt tabs
open file python
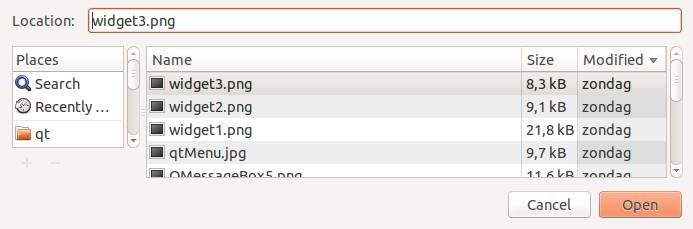
In this short tutorial you will learn how to create a file dialog and load its file contents. The file dialog is needed in many applications that use file access.
Related course:
File Dialog Example
To get a filename (not file data) in PyQT you can use the line:
filename = QFileDialog.getOpenFileName(w, 'Open File', '/') |
If you are on Microsoft Windows use
filename = QFileDialog.getOpenFileName(w, 'Open File', 'C:\') |
An example below (includes loading file data):
#! /usr/bin/env python |
Result (output may vary depending on your operating system):
Download PyQT Code (Bulk Collection)
pyqt display image
progressbar python
python browser
pyqt4
In this tutorial we will teach you how to create a graphical application with PyQT4. This will work on any platform that supports PyQT4 including Windows, Linux, UNIX, Android, OS X and iOS.
Related course:
PyQt4 installation
PyQt does not include Qt itself – you may have to obtain it separately.
The homepage for PyQt is https://www.riverbankcomputing.com/software/pyqt/.
You will need to install some packages:
|
That should install qt4. If python-kde4 cannot be found update your repository to find it. If you are on Ubuntu use this link.
Building a PyQT4 GUI
Now we can use the QT Designer application. It saves us from writing tons of layout code that you may be used to when writing HTML. Start qt4-designer from your applications menu. The QT Designer application will appear.

Press Dialog without Buttons and press Create. You can now drag any component from the widget box to the form. Simple drag and drop. We added a button, label and a pixmap. (I took a random image from the web for the pixmap)
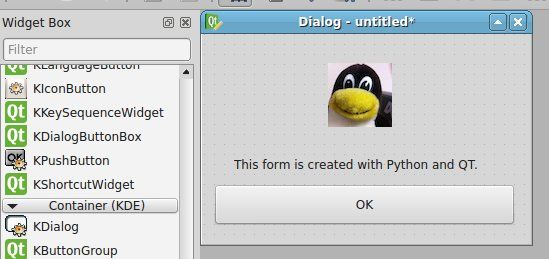
Our window looks like the image above. Press Form > Viewcode. We will get a popup box with the form code in… C++! That is great, but we want the Python code. Press File > Save as > form.ui.
The file test.ui contains your form described in XML format. (You can view it in a text editor) Open a console and type:
|
Running the file does nothing. Create a new file called gui.py
Paste the code below:
|
Run with:
|
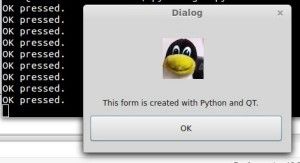
This will open our qt4 graphical interface. Pressing on the OK button will simply close the application.
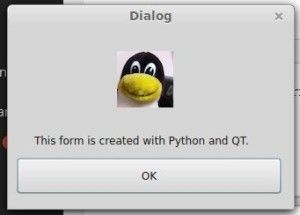
We want to add some action when the OK button is pressed. We add these three lines to the code:
|
Download PyQT4 Examples (Bulk Collection)
You may like: Create a webbrowser with PyQT4 or PyQt4 Overview